First loops and basic behaviour
Understand how clips record, play, stop, and respond to timing.
Open first loopManual
The manual is where Loopy Pro's full depth lives: routing, clips, actions, widgets, MIDI, plugins, sequencing, troubleshooting, and all the details you need once your setup starts becoming your own.
Use the left-hand navigation to jump straight to the part of Loopy Pro you are shaping right now.
When the manual gets abstract, pair it with the Learn page, videos, and community setups so the concepts land faster.
Jump In
You do not need to read this in order. Loopy Pro makes more sense when you enter through your immediate problem or musical goal.
Understand how clips record, play, stop, and respond to timing.
Open first loopGet important functions under your hands, feet, or controller surface.
Open MIDI learnMake the interface fit the way you actually perform and think.
Open the canvasMove from reactive performance to structured transitions and hands-free sections.
Open sequencerWelcome to Loopy Pro!
Note: The manual is a living document. It is frequently updated in response to user feedback. If you have questions, please contact us via the support link found in Loopy Pro’s Help panel.
Be sure to go through the in-app tour (in the Help menu, top right button), and check out some of the fantastic tutorials already being released, and Max Yar’s excellent Loopy Pro course.
At its heart, Loopy Pro is a live-looper – it lets you record and layer pieces of sound which play in loops, to perform and construct musical arrangements on the fly. But it goes a lot further, and includes a variety of tools to customise your workflow so you can use Loopy Pro for a lot more than just live-looping.
Loopy Pro is:
And there’s a lot more still to come.
This guide will take you through the fundamental concepts behind Loopy Pro, starting with clips and the colour system, then effects and audio inputs, the actions system, widgets and the clock.
You’ll be introduced to the basics of live looping and the variety of ways it works in Loopy Pro, with concepts like pre-set vs free looping, Retrospective Record, Intro and Tail recording, and Overdubbing, and you’ll be introduced to the gestures system for on-screen interaction. For those who work with pre-made audio, rather than recording it live – or those who want to work with a combination of pre-recorded and live-recorded samples, this guide will also describe the many ways to bring audio into Loopy Pro.
Loopy Pro’s powerful mixer – where much of the project setup takes place – will be examined in detail, and each section and function described: colours, effects, audio inputs, MIDI and buses/sends. Then we will explore the Canvas, and how to set up almost any on-screen layout and control scheme you can imagine.
Song structure and sectioning, and the various ways this can be realised in Loopy Pro will be described, with Play Groups and the various configurations that can be applied. We will also explore the various Play actions that can be setup, for an additional level of customisation and flexibility.
We’ll go through Loopy Pro’s Actions system, and examine how it allows you to control every aspect of your project – with on-screen controls, or via a MIDI controller, or through Follow Actions. And we’ll follow with an examination of the MIDI Learn and MIDI Control system, and how to setup external MIDI controllers to control your Loopy Pro projects.
We’ll take a look at the sequencer, which has a DAW-like timeline for sequencing clip playback as well as driving a fully-automated live-looping session.
Finally, after a quick discussion of running Loopy Pro as an AUv3, hosted within another app, we’ll finish by taking a look at each settings screen.
But first, some Loopy Pro fundamentals:
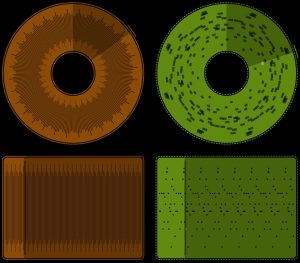
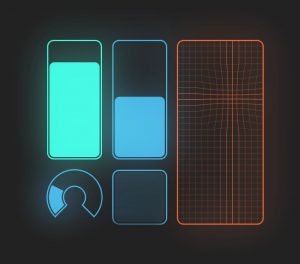
Clips in Loopy Pro hold individual pieces of audio or MIDI. They come in two flavours: loops and one shots.
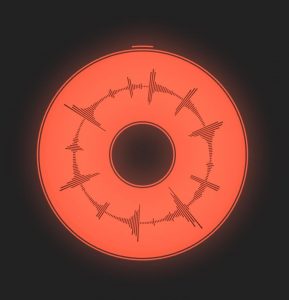
Usually circular, and built to play their contents seamlessly.
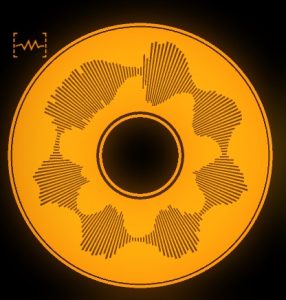
Usually square or rectangular, and triggered as short sounds or phrases.
Loops usually appear as circles in Loopy Pro, and play their contents in a seamless loop. They are usually multiples of a bar in length. These are the building blocks of live-looping. Loop clips can be re-sized to be rectangular.
One shots, represented as squares or rectangles, play once and are usually shorter pieces of audio, like a drum hit, a vocal line, or a sound effect.
Audio clips (loops and one-shots) can be recorded live within Loopy Pro from the microphone, any audio hardware plugged into the device, and from any AUv3 Audio Unit Instrument, like a synthesiser.
MIDI clips can be recorded live, too, from the on-screen keyboard, a connected computer keyboard via Musical Typing, a connected MIDI controller like a keyboard or grid controller, or any plugin that generates MIDI like a sequencer. You can also create MIDI clips using the built in piano roll editor. MIDI clips record all MIDI they receive, including MPE data. Recorded MIDI notes can be edited in an easy-to-use piano roll. Non-note MIDI can be recorded and played back but is not yet editable.
You can even resample clips, audio or MIDI, which means recording some of Loopy Pro’s output back into a clip.
Clips play, stop, record and stop recording according to clip settings that can be set at the global, color or individual clip level. Swipe up on clips to see the clip details.
Clips as MIDI Destinations. Audio clips can be targeted by MIDI sources (MIDI clips, controllers, etc), in which case they behave as polyphonic samplers. Such clips can play the clip as pitched notes or as slices.
Clips can also be imported into Loopy Pro from outside: you can drag and drop from another app, like the Files app, straight onto a clip. You can import a clip from Files right from within Loopy Pro, or from Loopy Pro’s own Media manager. You can copy and paste audio from another app, or another device, or you can AirDrop from another device into Loopy Pro. You can also copy audio files over USB into Loopy Pro’s Documents folder, and open them from Loopy Pro’s Media manager.
Both imported clips and recorded ones can be time-scaled; when importing a clip, Loopy Pro will attempt to automatically identify the source audio’s tempo, and can optionally adjust the audio to match your current project.
Loops can be grouped together into sections, which can start and stop together, or play one at a time. Loops can be configured to play and stop with a count-in/count-out, which will wait until a given point in the timeline before starting or stopping, or they can play and stop immediately. Both loops and one shots can be configured to play only while holding, or to toggle with each tap – one shots will retrigger from the start, in this mode.
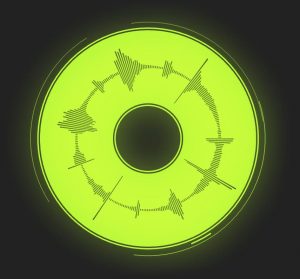
A clip’s display indicates its state: whether it is playing*, stopped*, muted, recording, or in transition to playing, stopping or recording.
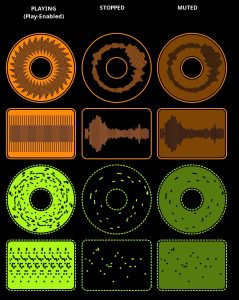

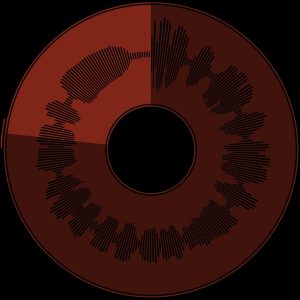
Playing and Stopped are terms we use when play-enabled and play-disabled or not-play-enabled might be more accurate. A loop is said to be playing if it is play-enabled and the transport is stopped; for the purpose of actions, it is in the play state or play-enabled state. If the transport were running, it would be playing. Similarly, when the transport stops, play-enabled clips are not said to be stopped. Why does this matter? Play and stop follow actions are triggered by clips changing between these states rather than whether the clip is actually playing or not. For example, if a clip is playing and the transport stops, Stop Clip follow actions aren’t triggered. Stop Clip follow actions get triggered when the clip switches from play-enabled to not play-enabled. That would be a lot of words to use; so, we say that the play-enabled clip is playing and the not-play-enabled clip is stopped.
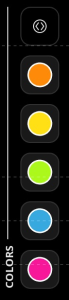
In Loopy Pro, clips – both loops and one shots – are organised into colours. Colours provide a visual distinction between different kinds of clips in your project, but they also perform a larger role.
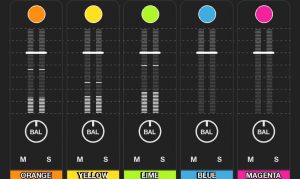 Colours in Loopy Pro behave similarly to tracks in a traditional DAW. Each colour has a channel strip in the mixer, with controls for volume, balance, mute, and solo, and you can apply insert effects and sends to the output of each colour. You can also specify a different output channel for each colour, if you are using an audio interface. And you can assign different audio inputs to different colours.
Colours aggregate the output of clips, and provide effects and audio routing. They’re like tracks in a traditional DAW.
Colours can also perform an additional role: customisation of behaviour. Clip Settings, which define how a clip plays and records, can be defined at three levels: (1) Project-wide; (2) at the colour level; and (3) at the individual clip level. For example, you can override the project-wide clip settings by changing some settings at the colour level – and then all clips of that colour will take on those settings.
With Loopy Pro’s flexible and powerful actions system, colours can do even more, and play a role in sectioning.
You can add as many colours as you like, in the colours editor. You’ll see a channel strip in the mixer for every colour associated with at least one clip in your project.
Most configuration in Loopy Pro can be defined at three levels:
The settings have the following hierarchy: all clips use the project-wide setting unless a setting has been overridden by the clip’s colour. In turn, a colour’s setting may be overridden at the individual clip level. If a setting is overriden at the colour or individual clip level, changes to that setting at the global level will not affect them. If a setting is overridden at the individual clip level, it is not affected by changes made at the global or colour level.
Individual actions can use settings that are independent of the inherited settings. For example, you could have an on-screen button or a MIDI Binding that triggers retrospective recording even if the inherited setting is normal recording. You might have a button that records with overdub as the After-Recording action even though the project-wide settings is Play after record.
This allows for a very flexible configuration scheme, where you can, for example:
See Clip Settings for more information about the configuration hierarchy and overrides.
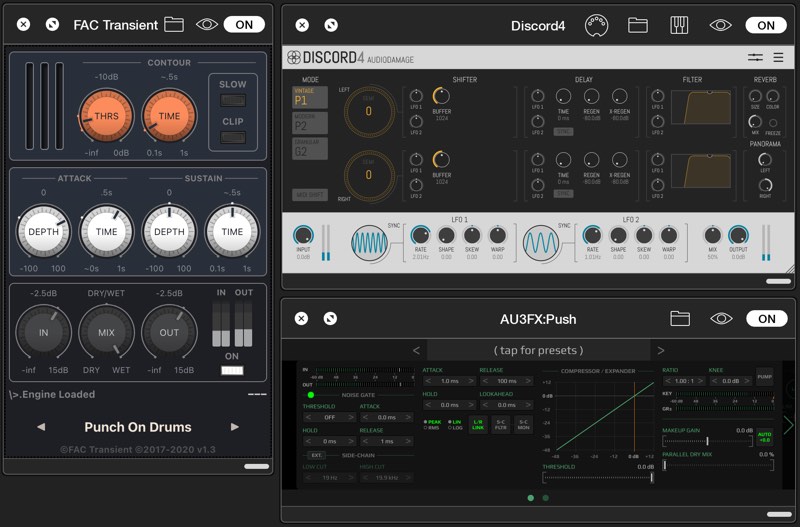
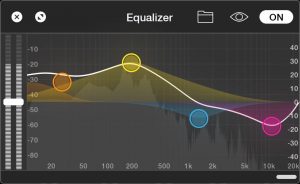 Loopy Pro has a growing range of built-in audio effects, including a fully-featured stereo parametric equaliser, filters like low-pass and band-pass, reverb and dynamics, and also supports AUv3 Audio Unit effects.
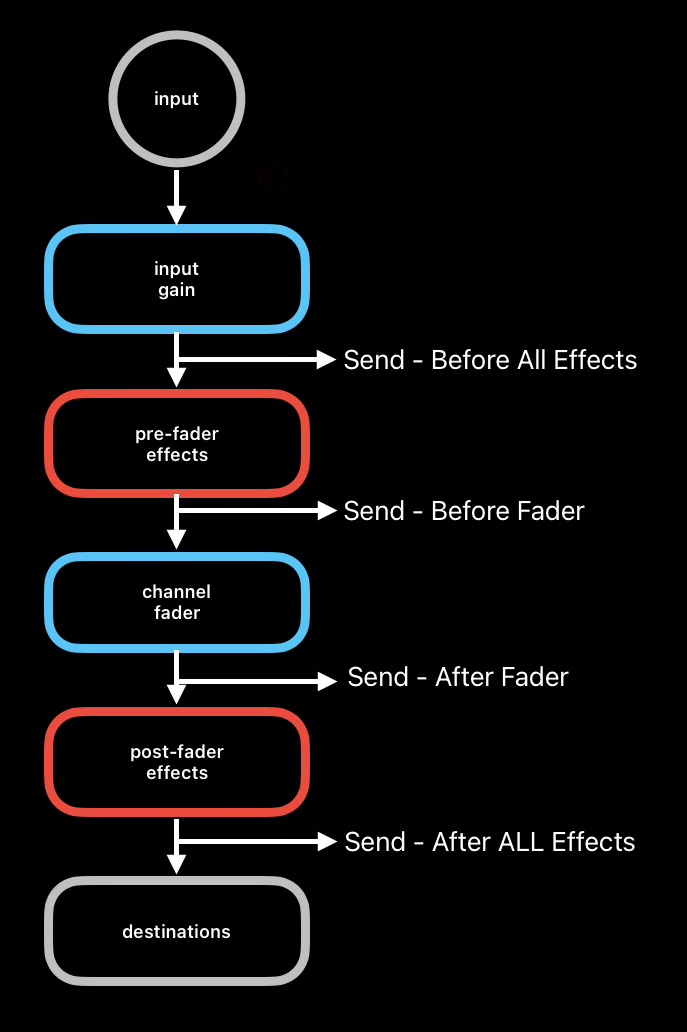
Effects can be applied in a range of places. They can be applied as insert effects to colours, to audio inputs, and to the master output. They can be applied either pre- or post-fader, so that volume changes occur before or after an effect is applied.
Effects can be chained together, and the same effect can be applied to multiple tracks simultaneously, using Loopy Pro’s sophisticated automatic grouping and instancing features.
Loopy Pro also supports buses and sends: you can create a bus channel, which acts as an aggregator of multiple audio tracks, then apply effects to this bus. Then you can create sends from other channels, which allow you to determine how much of each channel is sent to that bus. This allows you to create sophisticated and expressive effects which are applied on top of each channel.
Once you have added effects using the mixer, effects will appear on the main screen of Loopy Pro in the bottom bar, or they can be hidden by tapping the eye icon on the toolbar of the effect window.
Loopy Pro allows you to record live audio from a range of sources. You can record from your iPad or iPhone’s built-in microphone, with an echo cancellation system to reduce echo and feedback from your speakers. If you have a USB audio interface, you can record audio from any number of its channels, including directing different channels to different colours.
You can also use AUv3 Audio Unit instruments and other generators within Loopy Pro, with sophisticated support for MIDI clips, MIDI controllers and AUv3 Audio Unit MIDI sequencers.
All audio inputs appear within Loopy Pro’s mixer as a channel strip. You can apply insert and send effects to any audio input, and configure each audio input to monitor through specified output channels, or even monitor through the target colour groups and associated effects, so that you can record the dry, un-effected signal while hearing the wet signal with effects applied.
Once you have added Audio Unit audio inputs using the mixer, they will appear on the main screen of Loopy Pro in the bottom bar, or they can be hidden by tapping the eye icon in the Audio Unit window’s toolbar.
Loopy Pro supports receiving MIDI from MIDI controller hardware, network and Bluetooth MIDI sources, and AUv3 Audio Unit MIDI generators, such as sequencers. You can also generate MIDI in-app with the On-Screen Keyboard or Musical Typing.
You can use MIDI to drive AUv3 Audio Unit instruments, to control Loopy Pro’s own actions via MIDI, and for recording to MIDI clips.
Like audio inputs, MIDI sources appear and can be configured in Loopy Pro’s mixer. You can chain MIDI sources together to apply MIDI filters, arpeggiators, chord generators and the like.
Loopy Pro provides a powerful actions system for controlling every aspect of your project. Actions include controls for clip playback and recording, and audio parameters like volume, balance, pitch and speed. There are actions to adjust effect parameters and sends, play and stop the master clock, adjust input gain and enable/disable inputs, change tempo, and much more.
Loopy Pro’s actions can be controlled in a range of ways.
You can use MIDI Learn to easily make bindings between a MIDI controller and an action that corresponds to an on-screen object, such as a clip or a fader. You can make more sophisticated bindings to MIDI controllers manually using the MIDI Control screen.
You can attach actions to on-screen gestures, and to Follow Actions which occur in response to certain events, like clip playback or recording.
And you can control actions from on-screen controls that you can create called widgets.
 Widgets in Loopy Pro are on-screen elements that you can create, arrange and configure to suit your workflow. There are buttons, sliders, dials, X-Y pads, text labels and even a clip slicer control, with more widget types to come.
Widgets work closely with Loopy Pro’s actions system: once you create a widget, you configure it to perform one or more actions. For example, a button widget could turn on a row of clips. A dial could adjust the levels of a few clips, or the amount of a send. An X-Y pad could control a number of effect parameters.
With widgets, you can create project layouts that work almost any way you can imagine.
To add a widget, access the ![]() canvas editor and tap on the icon of the widget type you would like to create. Tap again to show the action editor.
canvas editor and tap on the icon of the widget type you would like to create. Tap again to show the action editor.
See the Canvas section details about editing the canvas. See Actions for details about the available actions.
When you’re using Loopy Pro with no attached audio interface or headphones, Loopy Pro will by default enable its echo cancellation system. This is designed to reduce the amount of sound coming from your speakers that gets recorded. Without this, due to the proximity of the speaker and the microphone, it is very difficult to record loops without capturing all the audio currently being played.
Loopy Pro’s echo cancellation system requires a brief calibration, which involves emitting a series of chirps, and then performing some processing in order to determine the properties of your device’s acoustic feedback path. When you move your device around substantially – such as placing it down on a table – it’s recommended that you recalibrate the echo cancellation system to take into account the changed acoustic environment.
You can perform calibration at any time by opening the mixer and tapping the microphone icon at the top of the hardware input channel strip, then tapping “Calibrate”.
You can also disable echo cancellation in the same place.
Disabling echo cancellation may be necessary if you wish to use a Bluetooth headset such as the AirPods, or if you are experiencing difficulties with audio level drops using screen recording.
Echo cancellation requires a built-in feature of iOS called “Measurement Mode”, which has a number of unfortunate quirks, including preventing the use of Bluetooth audio devices and dropping the device output audio level.
By disabling echo cancellation, you will also disable Measurement Mode, which will resolve these issues, at the cost of losing the echo cancellation functionality. I have been in discussions with the team at Apple and hope that these shortcomings will be resolved in time.
A Loopy Pro project contains layout pages, the project’s audio files and the project profiles that contain the MIDI mappings for that project. Loopy Pro projects can be opened and managed in Loopy Pro’s project browser and from the iOS Files app. You can use the iOS Files app to manage and backup your projects.
The canvas is Loopy Pro’s central area. It contains the clips and widgets with which you interact. Tapping the pencil icon lets you add, delete and re-arrange clips and widgets. You can add pages to your project while in canvas edit mode.
Control profiles store the MIDI and keyboard mappings we call bindings. There are two types of profiles:
Control profiles are editable and can be accessed from the Control Settings panel. When you use MIDI Learn, the created bindings are stored in these profiles.
Loopy Pro is optimized for seamless real-time musical performance. It provides some tools to help you get the most out of your device.
Loopy Pro features an idling mechanism that puts inactive plugins to sleep to free up the DSP (digital signal processing) resources they use. Effects that are receiving no signal are automatically idled as are Audio Unit Instruments whose channels are muted. This mechanism allows you to load more plugins than would normally be able to be loaded without taxing your device. When a plugin is idle, it will not respond to incoming MIDI. Turning an effect off also frees up the DSP resources that it uses.
Disable automatic idling. There are cases, such as when a sampler is loaded as an effect, where you may want to disable idling. You can long-press on the On/Off/Idle display in an AUv3’s window to disable idling for that plugin. When you disable idling for a plugin, Loopy Pro will disable automatic idling for all instances of that plugin and will apply the setting in other projects as well.
While idling frees up the DSP resources used by a plugin, idled plugins still use memory and may use non-DSP CPU resources. Some idled plugins may consume power and background resources even when idle.
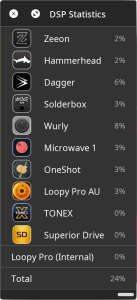
Loopy Pro’s DSP % indicator provides a reading of the percentage of available DSP resources being used. This indicator is helpful for assessing your device’s current processor load. If the DSP load goes over 100%, audio artifacts such as crackles and pops are likely. Tap on the indicator to see a listing of the loaded plugins and the amount of DSP resources they are using.
To reduce the DSP load, you may want to do one or more of the following:
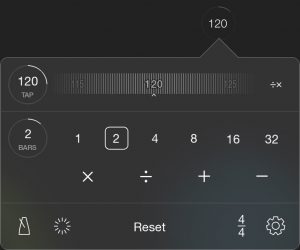 The clock in Loopy can be found at the top right, and controls both your session’s tempo, and the quantisation interval for certain actions, like recording loops – the “Master” cycle length. Tap on the tempo or where — (indicating no tempo has been set) is displayed to pop up the clock panel.
You can adjust the tempo of your session by dragging the tempo jog wheel right or left, tapping in the left or right sides of the jog wheel, or tapping in the middle to enter a tempo using the keyboard. Your project’s audio will be time-scaled dynamically to fit the new tempo.
You can also tap out a tempo by tapping on the “Tap” button at the top left of the clock controls.
You can also synchronise the clock with other hardware and apps, using either MIDI Clock Sync or Ableton Link, and you can modify any clock parameters using actions and MIDI control.
Once you have audio content loaded within a project, you will see white bars on the tempo jog wheel which correspond to the native tempos for the loaded audio. The jog wheel will snap to these points, making it easy to return to the original, un-time-scaled audio at any point.
If your tempo has been set by the first recorded loop, sometimes it may be incorrectly guessed as double or half the actual tempo. You can use the ÷⨉ tempo correction control to the right of the tempo jog wheel to halve or multiply the tempo without time-scaling the loops.
You can reset the tempo to an “unset” state at any point. This will put Loopy Pro into a state ready to assign the tempo from the next loop which is recorded.
When the tempo is currently unset, you can provide minimum and maximum bounds for detection of tempo, when tempo is set by recording the first loop. This can help if a loop is detected at double or half the desired tempo.
This option is only available before the tempo has been set. Turn this option on to have Loopy Pro set the boundaries of the tempo-establishing first loop so that the tempo is set to the nearest whole number BPM. This can be useful when planning to export the recorded clips for further use within a DAW environment that may require whole-number tempo values. This option does not time fit the loop but rather adjusts its end point so that the loop’s tempo is an integer.
In many traditional live-loopers, the first loop sets the length of subsequent loops. Loopy Pro provides additional flexibility, and allows you to dynamically set this “Master” length. If you are using Count In and Count Out for your record configuration – Loopy Pro’s default setup – it’s this which determines the length of your loops.
You can change this length via the clock controls by tapping the buttons beside the “Bars” indicator. Jump straight to a length by tapping the numbers, or vary the current length using the mathematical operators: Double, Halve, Add 1, Subtract 1.
You can also modify this length using actions and MIDI control.
You can set a wide range of time signatures in Loopy Pro by tapping the time signature button at the bottom right of the clock controls – by default, this will read “4/4”, indicating four quarter notes per bar. Loopy Pro lists common time signatures for you to choose from. The numerator (the top number) is the significant number in Loopy Pro. That is the number beats per measure. Loopy does not make use of the denominator (the bottom number). Time signatures displayed as 6/8 and 7/8 are the same to Loopy as 6/4 and 7/4.
If you enable the “Update Tempo” switch on this screen, Loopy Pro will keep the duration of each bar constant, while updating the tempo to fit the number of beats you have selected into that duration.
Tap on the gear icon to access additional clock settings.
This is the same as the setting in the global Clip Settings. When no clips are playing, the clock will be paused.
Performs a one-measure count-in when the playback is started via the transport’s play button.
This determines whether the playhead is reset to the beginning when the transport stops. It can be set independently for the main screen and the Sequencer.
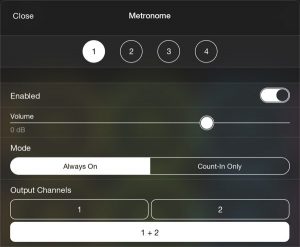 Loopy Pro has a built-in metronome, both audio and on-screen flash, which you turn on and off using the metronome and flash buttons at the bottom left of the clock screen.
The metronome has four different sounds: A woodblock, high-hat, beeps, and clicks. You can adjust its volume, and if you have an audio interface, you can assign the output channels it is sent to, so that you can separate the metronome from other outputs.
You can also configure when the metronome is enabled: always, or only when a loop is counting-in to begin recording.
Loopy Pro is many things, but at its core it’s a live looper. Live looping is a form of live music production where a track is built up in layers, in real time. In a performance, it allows the audience to witness a song being built from scratch, often from nothing more than the performer’s voice, augmented by effects.
In the studio, looping provides a fun and creative way to experiment with musical ideas and can be an invaluable songwriting aid.
 In most live looping environments, the first loop sets the tempo, and forms the basis for the rest of the session. Loopy Pro provides a number of ways to begin a session, but by default it will wait for your first loop.
To record your first loop, you tap on one of the empty loops. Loopy Pro begins recording as soon as you release your finger, and will continue recording until you tap again – recording will finish when you release your finger.
Note that recording triggers upon release, rather than press, in order to achieve better touch and timing accuracy: touches on a touchscreen can often be missed if one’s fingertips are too damp or too dry. So: when you’re ready to begin recording, place a finger on the screen. Then release to begin. Ditto when finishing: place your finger on the screen head of time, then release to finish.
You can change this setting to on press, if you choose, by opening Clip Settings, then Gestures at the bottom, and turning on the switch beside “Record On Press”.
Automatic Loop Detection allows Loopy Pro to help you record a tight first loop. It applies only to the first loop. This feature is primarily for people new to looping that can use some help establishing a tight first loop. It is optimized for a few conditions: the meter is correctly set, the input signal is sufficiently strong, the loop length is a power of 2 measures long (i.e. 1, 2, 4, 8 or 16 measures), the audio is reasonably percussive with a clear rhythm.
If you have trouble with automatic loop detection, make sure that you have a strong signal in Loopy Pro’s mixer and that your loop is an appropriate length as described above.
If you find that the detected loops are not the correct tempo, you can revise the detection range from the clock controls.
If you set a loop length and, optionally, an approximate tempo before recording, and enable the “Auto-End Detected Loop” setting in Clip Settings, Loopy will automatically stop recording when it detects a loop and begin playing, for a seamless automated start. NOTE: this feature works best when the loop length is a power of 2.
But as you gain experience with looping, you may choose to disable automatic loop detection and coordinate the record start and stop timing yourself. You can turn off automatic loop detection in Clip Settings, by turning off the switch beside “Auto Loop Detection”.
Without automatic loop detection on, the time that you start and stop recording the first loop is very important. You begin recording on the first beat – the “1” – and then finish recording at the end of the last beat; the final “1”. For example, if you have a one-bar loop as your first loop – “1, 2, 3, 4” – you’d trigger record start on the first “1”, and end on the “1” after the end: “1, 2, 3, 4, 1“. Loopy Pro will then begin playing back your loop immediately.
 Refining the First Loop
After the first loop is recorded, a glyph appears to its left. Tapping the glyph brings up a panel for refining the first loop. The glyph goes away when either the next loop is recorded or the project is saved. There are two different versions of the panel depending on whether auto loop detection is turned on or not.
If auto loop detection is on, the panel provides several proposals for the loop in addition to an option to trim the loop manually. Otherwise, the panel lets you refine the loop’s start and stop points, the tempo and the beats per bar.
You can also set the tempo prior to recording your first loop and optionally use a metronome to keep you in time.
Loopy Pro provides a variety of ways to record loops.
 With a pre-set length configuration, Loopy Pro will count in to the next cycle, then record for a set length and stop recording automatically. This works well if you know in advance how long you want your loops to be, and allows you to record hands-free without needing a foot controller.
This is the default configuration in Loopy Pro, and mimics the behaviour of many hardware loopers.
There are a number of ways to configure loops to use a pre-set length. From Clip Settings, turn on “Auto Count Out”, and set “Count In Quantization” and “Count Out Quantization”:
You can use a combination of Count In and Count Out settings, to change Loopy Pro’s behaviour. For example:
You can also define these settings at the Colour and at the Clip level, as well as for individual actions for triggering via a widget or a MIDI controller.
Finally, you can also pre-set the length of an individual clip in that clip’s detail screen, which will automatically stop recording after the given length.
Loopy Pro also supports free looping. Upon starting a recording, Loopy Pro will continue recording indefinitely, until you trigger record end. The length of the loop will be – by default – quantised to the closest number of bars.
This allows you ignore any length restrictions, and determine the duration of each loop as you go.
To enable free looping, turn off the “Auto Count Out” setting from Clip Settings. You can also define this setting at the Colour and at the Clip level, as well as for individual actions for triggering via a widget or a MIDI controller.
You can optionally quantise the beginning and end of recording by setting the “Count In Quantization” and “Count Out Quantization” settings. This will cause Loopy Pro to count-in or count-out to sync with the given interval:
Retrospective Recording allows you to simply play, and then trigger a recording afterwards, when you have something you’d like to capture. This allows for a wonderfully free and creative workflow.
To enable Retrospective Record, open Clip Settings and turn on the switch beside “Retrospective Recording”. You can also define this setting at the Colour and at the Clip level, as well as for individual actions for triggering via a widget or a MIDI controller.
The duration of loops recorded via Retrospective Record is set by the master clock cycle, which can be changed on-screen or via an action, either from a button on-screen, or a MIDI controller.
Set “Retrospective Quantization” to determine how recording behaves:
With Loopy Pro’s very customisable configuration system, you can designate individual colours or even individual loops to use Retrospective Record, while keeping the other loops in normal record mode. Or, you can nominate a particular on-screen button or MIDI controller button to initiate Retrospective Record.
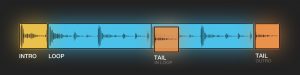
Loops in Loopy Pro can have attached intro and tail/outro sections, which play before the loop begins, and after it ends, respectively. Tail sections can also be mixed into the loop, after the first cycle has been played.
You can enable “Record Intro” and “Record Tail” in Clip Settings, and these additional parts will be recorded.
Intro recording: Intros are made up of audio that happens during a count-in before the main loop starts recording. Intro sections are particularly useful for representing anacruses/up-beats: part of a musical phrase that precedes the first beat. During playback, the intro is played before the loop starts playback. It is not repeated as the clip loops.
During a recording count-in, Loopy Pro will listen for audio and record any audio played before the count-in’s end as the intro. When intro recording is on, a ‘waiting for threshold’ message will appear during the count-in. Intro recording starts when audio crosses a threshold to trigger the intro recording. For intro recording to work, there must be a recording count-in and threshold recording must be off in recording settings. Threshold recording interferes with the threshold used for intro detection.
Tail recording: After ending a loop recording, Loopy Pro will continue to record for a little while. Recording will stop when Loopy Pro detects the end of a decay, when the audio level is no longer decreasing. You can also tap to end tail recording immediately.
Tail sections allow you to capture the end of a reverb, or a natural acoustic decay, without it being cut-off at the end of the loop, for much more natural-sounding loops.
You can also designate regions of imported audio to be an intro or outro, in the import screen, or after import on the clip detail screen.
After a loop has been recorded, you can record additional layers on top of the same loop. This is overdubbing and you can use it to, for example, add harmony lines to a melody, or augment a beatbox loop with additional sounds.
While a loop is overdubbing, it will continue to add new layers for as long as recording continues.
There are a number of ways to trigger overdubbing. By default, you can 2-finger-tap a loop to immediately begin overdubbing, and tap again to end (you can change this gesture, if you like, in Clip Settings, to something like a swipe or tap). You can also trigger overdubbing via a “Record” action, from a button on-screen or a MIDI controller.
To automatically begin overdubbing after the first loop has been recorded, you can also set the “After Recording” setting in Clip Settings to “Overdub”. This setting can be assigned at the global level, for individual colours, or individual clips.
Loopy Pro has a number of built-in gestures which you can perform on-screen. You can configure these however you like, either at the global level, per-colour, or per-clip.
Here are the default gestures:
You can bind any actions to gestures, to create very custom interfaces. Available actions for binding are: tap, two-finger-tap, swipe (any direction), swipe up, swipe down, swipe left, swipe right, long swipe (any direction), long swipe up, long swipe down, long swipe left, long swipe right, long press.
Loopy Pro can be used as a live-looper, a clip-launcher, or a combination of the two. You can import pre-recorded audio or MIDI to clips, and then play them alongside live-looped content.
With Loopy Pro’s high-quality live time-stretching, you can import pre-recorded loops, then reset the clock tempo, putting Loopy Pro in a state ready to take the tempo from the next recorded loop.
The next loop that you record will behave like the first loop of the session. The tempo and master cycle length will be derived from that loop, and all other audio content in the project will be instantly and automatically time-scaled to fit that new tempo.
This is an incredibly powerful way to run a traditional live-looping performance while also augmenting it with pre-recorded content – all without requiring a pre-set tempo.
Loopy Pro can load content into projects in almost any audio format, with time and pitch adjustments to fit. There are a wide range of ways you can load content into Loopy Pro:
You can drag-and-drop one or more files from any compatible app, such as Files, with its built-in support for services like Dropbox and Google Drive, and USB hard drive and network file server support.
By opening up Loopy and Files side-by-side using the iOS multitasking controls, you can simply drag audio files onto each loop, one at a time, or in a batch.
From any app that supports sharing, you can select Loopy Pro as the sharing target, and the audio will be loaded into Loopy Pro’s Media manager, ready for importing.
From a Mac or anther iOS device, you can AirDrop one or more audio files to your device running Loopy Pro, and then select Loopy Pro as the target. The audio will be loaded into Loopy Pro’s Media manager, ready for importing.
Loopy Pro’s Documents folder is visible within the iOS Files app. You can copy and move audio files into this folder, and the audio will appear within Loopy Pro’s Media manager.
Loopy Pro’s Documents folder is also available as a destination for copying files via a USB cable, using the macOS Finder, or a third-party app like iExplorer or iFunbox.
Loopy Pro can load audio files from the clipboard, copied either as files or using Audio Copy. You can find copied audio within Loopy’s Media manager.
 Loopy Pro has its own media management system, accessed either by tapping the folder button at the top left of the screen, then “Media”, or by selecting the import button from the clip detail screen.
You can organise audio into folders, and import new audio from the document picker, or your music library (Note: Apple Music library is not supported, due to Apple’s DRM restrictions).
You can preview audio files by tapping the play buttons, or tap on the filename to open the import screen.
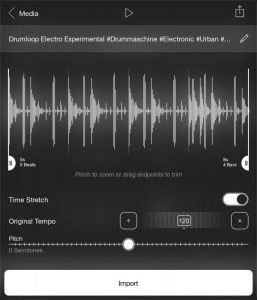
Once you have selected a file for import, the waveform is visible, with trim handles for selecting a subregion of the audio file. Drag these handles left or right, and pinch to zoom in the waveform area.
By default, if your project has a tempo set already, Loopy Pro will attempt to detect the tempo of the audio, and will apply time-stretching on import to fit the audio to your project’s tempo. You can specify the original tempo of the audio in this screen, and Loopy Pro will calculate the required time stretching parameters. Swipe left or right on the tempo jog wheel, or tap in the middle to type in a tempo.
You can also adjust the pitch of the imported audio, to fit the key of your project.
If you have selected a subregion of the audio file using the trim handles, Loopy Pro will offer to import the audio preceding and/or following the selected audio as intro or tail regions, which will play before and after the loop starts/stops.
Tap “Import”, and Loopy Pro will prompt for a target track, if you have opened the Media manager from the folder menu. If you are importing directly from the clip detail screen, the audio will be imported to the clip immediately.
After import, you can adjust the original tempo and further trim the audio, in the clip detail screen.
Loopy Pro’s powerful mixer gives you control over your project’s audio and MIDI inputs and outputs, effects, AUv3 and IAA instruments. Loopy’s mixer was designed to be flexible and to enable source/destination routing to be handled directly in the mixer.
In its simple form, you can adjust levels and balance, mute and solo for source and colour in your project. In its extended form, you can add audio and MIDI sources, add effects, add Audio Unit and IAA instruments, add buses, specify hardware outputs, set up audio and MIDI routing, and collapse mixer sections (which will become hidden when the mixer is in simple mode).
Open the mixer by tapping the ![]() button from the main screen.
button from the main screen.
Add hardware inputs, Audio Unit Instruments, Inter-App Audio Inputs, and MIDI sources to your project by tapping ![]() when the mixer is open.
when the mixer is open.
Loopy Pro’s mixer has two modes: simple mode and extended mode. Simple mode is a compact representation of the mixer that shows only the most essential controls with a reduced view of the main canvas displayed above it. Extended mode provides a complete display of the mixer and provides full-access to the routing options and channel configuration. When the extended mode is visible, tap ![]() to put the mixer into simple mode. When it is in simple mode, tap
to put the mixer into simple mode. When it is in simple mode, tap ![]() button to put the mixer into extended mode
button to put the mixer into extended mode

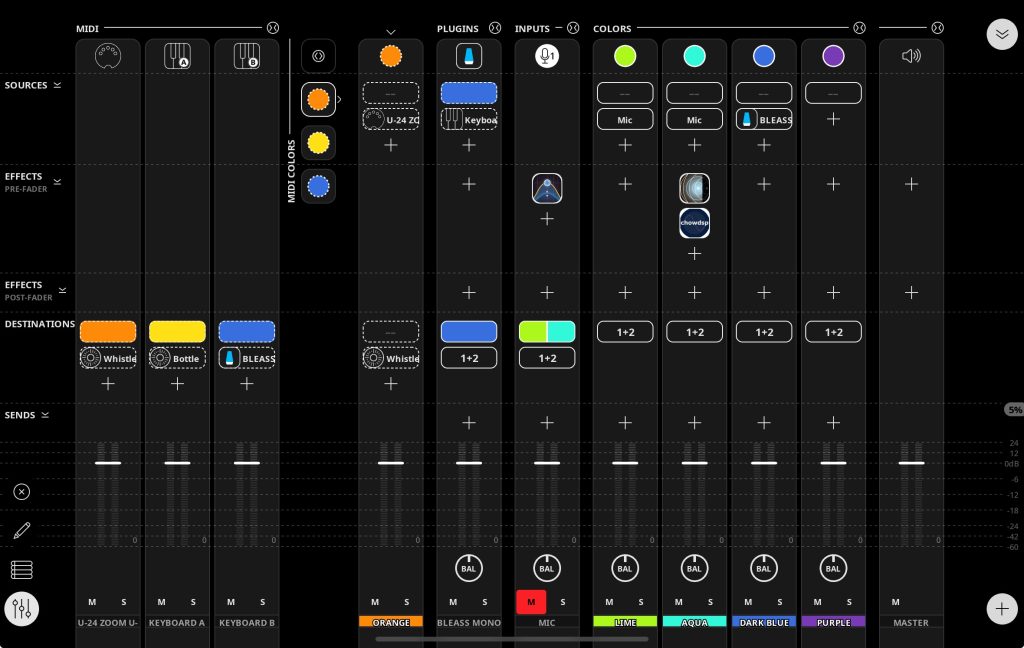
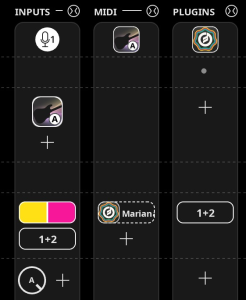
By default, Loopy Pro organizes the mixer’s channel strips into functional sections: (audio) inputs, MIDI (hardware controllers and MIDI ports), MIDI Plugins, MIDI Colors, Colors (audio), Buses, and Outputs (currently Master channel). You can rearrange the channel strips by dragging them, as described in the Channel Strips section below.
These sections can be collapsed by tapping ![]() . Collapsed sections can be expanded by tapping
. Collapsed sections can be expanded by tapping ![]() . Collapsed sections are hidden when the mixer is in simple mode.
. Collapsed sections are hidden when the mixer is in simple mode.
Showing collapsed items. You can tap on items in a collapsed section to show them without uncollapsing the entire section. Such items are given a white frame in the collapsed section display.
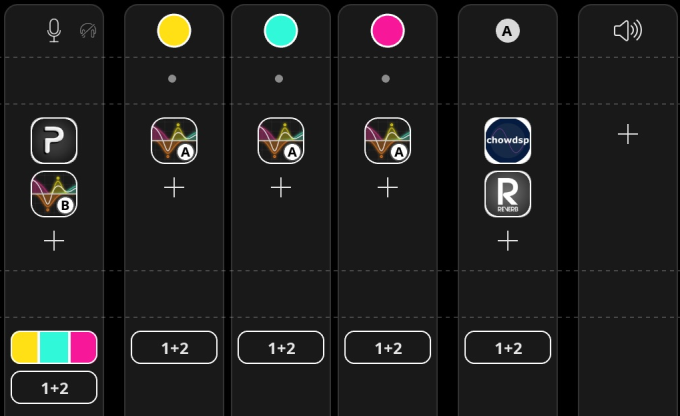
The mixer has rows for: sources, pre-fader effects, post-fader effects, destinations and sends. Tapping on the ![]() icon in a row cell (slot) lets you add an item to that row. Rows can be collapsed by tapping
icon in a row cell (slot) lets you add an item to that row. Rows can be collapsed by tapping ![]() . Collapsed rows can be expanded by tapping
. Collapsed rows can be expanded by tapping ![]() . Collapsed rows can also be expanded by tapping in them. When a row is collapsed a dot indicates that the row cell contains an item.
. Collapsed rows can also be expanded by tapping in them. When a row is collapsed a dot indicates that the row cell contains an item.
 The basic building-block in the mixer is the channel strip, a column in the mixer that might be:
Each channel strip has a fader and level meter, and mute/solo controls. Other cells (slots) are available in the channel strip depending on the channel strip’s type.
Audio channel strips. Channel strips for audio sources, audio colour channels and buses also have a balance knob and cells (slots) for sources, pre- and post-fader effects, send, knobs, and destinations. Hardware inputs, buses and the master channel do not have source cells.
MIDI. MIDI Channel strips have a destination cell (slot) and may have a source cell. While MIDI channel strips don’t have effects slots, you can chain MIDI plugins to create effect chains.
Renaming channel strips. To rename a hardware input, tap on its icon at the top of the mixer; tap the pencil icon ![]() next to its name and type the new name. To rename an Audio Unit instrument, open the AU’s window; tap on the gear icon
next to its name and type the new name. To rename an Audio Unit instrument, open the AU’s window; tap on the gear icon ![]() and edit the name in the settings panel. To rename a bus, long press its name in the mixer and choose Rename from the popup.
and edit the name in the settings panel. To rename a bus, long press its name in the mixer and choose Rename from the popup.
Fine control. To adjust levels, balance or send amount, tap and swipe on that control. For finer control, tap and then move your finger away from the control: the control area will expand the further away you move from the original control location, giving you more control over fine adjustment.
Mute/Solo. The M and S letters at the bottom of channel strips, mutes or solos that mixer channel. Muting an Audio Unit instrument’s mixer channel will normally idle the instrument so that it uses next to no CPU resources. Muting an instrument will also idle the effects on the channel unless idling has been disabled for the instruments and/or effects.
Mute Position (audio channels only). By default, muting of audio input channels (hardware and audio unit inputs) is post-fader. By long-pressing the M button, you can move the mute position to Input which is the start of the signal chain. Typically, the mute position is only moved for hardware inputs. When the mute position is set to Input, muting the channel will idle the effects on the channel since the input level will drop to 0 (unless idling has been disabled for some plugins).
Channel Settings. Tap the icon at the top of each channel strip to access settings and controls for that channel, and long press to replace or delete.
Reordering channel strips. You can also reorder channel strips as you choose, by pressing on the icon at the top, then dragging left or right (or swiping up to remove that channel strip).
Master Output. Loopy Pro’s Master Output channel strip is somewhat unconventional. The controls and effects in the channel strip labeled Master apply to all hardware outputs. Note: a mixer update is planned to implement a more conventional architecture.
![]()
Colours act like group buses for all the clips of the same colour. They aggregate the output of their clips and behave like tracks in a traditional DAW. All clips of the same colour get routed through the same mixer channel strip and share the same basic settings.
Each colour appears as a channel strip in the mixer, and has its own fader, balance, mute and solo, as well as sends, destinations, and effects (for audio colors). Audio and MIDI colours have their own channel strips. Both audio and midi colours inherit settings from the colour. The main menu’s Colour Groups item lets you set colour-specific settings, gestures and follow actions.
Tapping on a colour channel strip’s color icon, opens the Colour Group’s properties panel where you can set the properties for all clips of the colour.
If you have an audio interface, colours can be routed to any output channel.
Colours as destinations. By specifying a colour in the “destinations” section of a channel strip, clips of that colour will receive audio or MIDI from that source. This makes it simple to record (resample) from one color to another.
Audio and MIDI colour channel strips have the same rows (slots) as their underlying type: audio or MIDI. Se the Audio and MIDI source section of this manual for more details.
Colour Management. By default, the mixer only shows colour channels for colours that have clips. If you would like colours to appear even if they have no clips, turn on Show Empty Colour Channels in Loopy Pro’s System Settings.
Adding colours. To add colours to the project, enter layout edit mode by pressing the ![]() and tapping on the paint bucket
and tapping on the paint bucket ![]() .
.
Loopy Pro can receive audio from the built-in microphone, an attached audio interface (with support for multi-channel input), an AUv3 Audio Unit or Inter-App Audio application. Each audio source has its own channel strip.
Audio source channel strips may have the following rows:
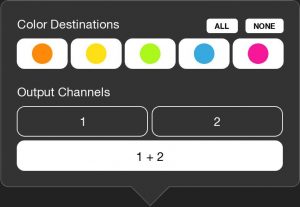 The destinations cell shows where the audio is sent. All of the project’s colors and all available hardware destination are available. A source can be routed to any number of available destinations. The audio is sent post-fader. For pre-fader audio routing, use a send knob to send the audio to a bus.
Add audio sources to the mixer, by tapping ![]() and choosing Add Hardware Input, Add Inter-App Audio Input, or Add Audio Unit Instrument.
and choosing Add Hardware Input, Add Inter-App Audio Input, or Add Audio Unit Instrument.
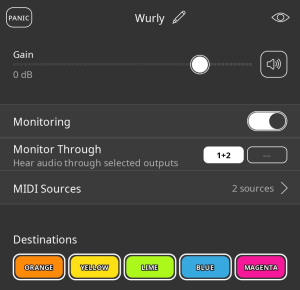
Monitoring sends an input to an output such as the main output or headphones so that you can hear that input. When the internal mic and built-in speakers are used, monitoring is turned off by default to avoid feedback.
By default, when monitoring is on, it is done through the default output channels. But you can set any available output channels for monitoring and you may also monitor through colors. The Monitor Through selector let’s you choose available hardware outputs and/or colour.
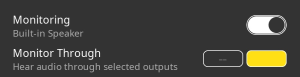
Monitoring through colors. When you choose one or more colours for Monitor Through, the audio is sent through the effects chain of the selected colour or colours. When using monitor through colours, you should generally not monitor through a hardware output also if you want to hear only the effected signal. This allows you to “monitor wet, record dry”
 Hardware inputs can be the built-in mic or inputs from an audio interface and are represented by a mic icon in the mixer. The default project has a single hardware audio input. If you are using Loopy Pro on a device without any equipment plugged in, this will be the built-in microphone. With an audio interface, this will be one of the available input channels provided by the audio interface.
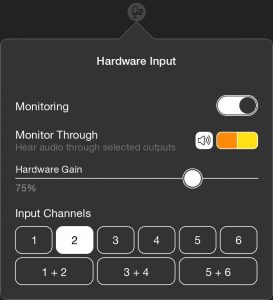
Input Options. Tap the mic icon at the top of the channel strip to configure the hardware input. A number of different options may be available, depending on the connected hardware:
Input Gain. As shown in the signal flow diagram in the Channel Strips section, there is an input gain stage between the actual hardware input and the pre-fader effects. Because this gain stage is so rarely needed (usually you adjust input levels on the audio interface itself), there is not an on-screen control for it in the mixer. You can control the input gain by adding a widget or MIDI binding. Use the audio source Adjust Parameter action, and choose the input gain parameter.
Global Hardware Gain. This setting is only available for some devices. It is a global setting that is applied by the hardware. The behavior depends on the audio interface itself. For some interfaces, this adjust the interfaces output gain. On some devices, it may also apply to input gain. It is a global control that applies to all channels.
You can have as many hardware audio sources as you like, including multiple instances of the same channel, so you can configure different effect chains on each one and mute or unmute duplicate channels as needed.
Loopy Pro supports hosting AUv3 Audio Unit instruments and generators, like synthesisers and other virtual instruments. These can be downloaded and installed from the App Store.
Add an Audio Unit instrument to your project by tapping ![]() when the mixer is open then choosing Add Audio Unit Instrument. Loopy Pro will present the New Audio Unit panel with all the available Audio Unit instruments. Normally, Loopy Pro will then pop up a list of MIDI Sources for playing the instrument. There is an option in the panel to turn off the MIDI Source prompt.
when the mixer is open then choosing Add Audio Unit Instrument. Loopy Pro will present the New Audio Unit panel with all the available Audio Unit instruments. Normally, Loopy Pro will then pop up a list of MIDI Sources for playing the instrument. There is an option in the panel to turn off the MIDI Source prompt.
Turning the source prompt back on. If you have turned off the MIDI Source prompt, you can turn it back on by tapping the gear wheel icon in the New Audio Unit panel.
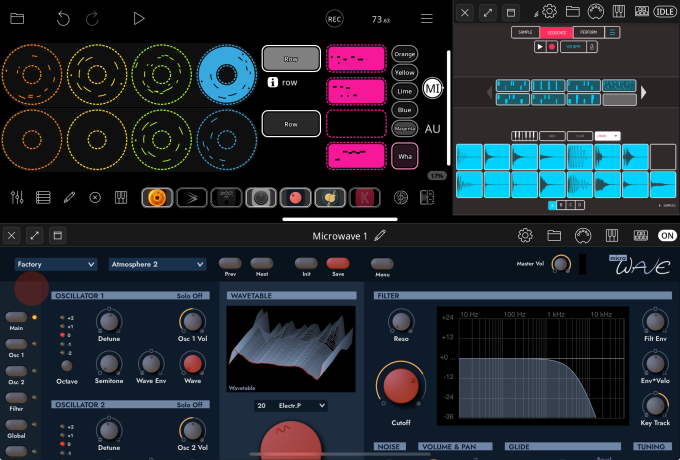
Tap the icon at the top of an Audio Unit’s channel strip or on the bottom bar to display its user interface in a moveable and resizable window. Tap ![]() or double-tap the titlebar to toggle fullscreen. Tap
or double-tap the titlebar to toggle fullscreen. Tap ![]() to close the window. Drag the bottom right handle to change the size of the window.
to close the window. Drag the bottom right handle to change the size of the window.
Audio Unit windows can be docked to the side or bottom of the screen. Tap ![]() to dock the plugin window to the side or bottom of the screen. Tap
to dock the plugin window to the side or bottom of the screen. Tap ![]() to undock the audio unit interface.
to undock the audio unit interface.
 Tap
Tap ![]() to access the audio unit settings panel. In the panel you can:
to access the audio unit settings panel. In the panel you can:
Loopy Pro supports both factory presets (provided the Audio Unit) and user-created presets. Tap ![]() to open the presets screen, where you can select from the available presets. Any presets visible in the presets menu are available to Loopy Pro’s preset selection action. Long-press a user preset to rename it, and swipe left to delete. Tap on a preset to select it. The selected preset has a Save and Export preset beside.
to open the presets screen, where you can select from the available presets. Any presets visible in the presets menu are available to Loopy Pro’s preset selection action. Long-press a user preset to rename it, and swipe left to delete. Tap on a preset to select it. The selected preset has a Save and Export preset beside.
Factory preset note. Many Audio Units have proprietary preset systems that do not expose their presets to hosts such as Loopy Pro. If you do not see the AUv3’s presets in Loopy Pro’s dropdown menu, you will have to add them to manually to Loopy Pro’s preset library by choosing New from the preset dropdown. For more on this topic see: https://wiki.loopypro.com/AUv3_Presets
Tap ![]() to access MIDI Source options.
to access MIDI Source options.
In the Audio Unit’s window, tap the ![]() button to show Loopy Pro’s onscreen keyboard. Keys tapped towards the upper side play at a lower velocity than when tapped towards the lower side. Tap
button to show Loopy Pro’s onscreen keyboard. Keys tapped towards the upper side play at a lower velocity than when tapped towards the lower side. Tap ![]() to toggle hold of the current notes. Tap the
to toggle hold of the current notes. Tap the ![]() to toggle position lock – when unlocked, you can pinch and zoom to navigate around the keyboard. Tap
to toggle position lock – when unlocked, you can pinch and zoom to navigate around the keyboard. Tap ![]() to expand the keyboard to fill the window, and tap
to expand the keyboard to fill the window, and tap ![]() to hide the keyboard.
to hide the keyboard.
Tap ![]() to activate MIDI typing which lets you use a connected typing keyboard to play notes. The musical typing keyboard is added to the mixer as a MIDI source.
to activate MIDI typing which lets you use a connected typing keyboard to play notes. The musical typing keyboard is added to the mixer as a MIDI source.
Audio Unit instruments can be controlled with the on-screen keyboard or the Audio Unit’s own on-screen controls. Generally, they will be controlled by a MIDI controller or sequencer. Loopy Pro provides flexible MIDI routing.
There are a few ways to connect an Audio Unit to MIDI sources:
Audio Units will appear on the bottom bar on Loopy Pro’s main screen by default, for easy access. If you wish to hide an Audio Unit from this bar, tap ![]() in the audio unit settings panel to toggle visibility.
in the audio unit settings panel to toggle visibility.
By default, muting an Audio Unit Instrument’s mixer channel puts the instrument and the effects on the channel into Idle mode, where they use little processing resources. With Idle mode, you can have many different Audio Units loaded, without overtaxing your device’s processor. Tap the ON button, or mute it from the mixer or an action to put the Audio Unit into Idle mode. Tap IDLE or unmute the Audio Unit from the mixer or an action to re-activate it. When an Audio Unit instrument goes idle, the effects on the mixer channel will also go idle (since effects normally go idle when the incoming signal drops to 0) unless you have disabled idle mode for the effect.
If you wish the Audio Unit to remain active when muted, you can disable Idle mode by long-pressing on the IDLE button, then turning off the switch beside “Enable Idle Mode” on the popover that appears.
Loopy Pro has a growing collection of built-in effects, and also supports AUv3 Audio Unit effects which can be downloaded and installed from the App Store.
Tap the + button in the Effects section of a channel strip to choose and add an effect. The effect’s icon will appear on the channel strip. Tap to open the effect’s configuration, or double-tap to toggle the effect.
You can also move effects around by holding and dragging between sections on the same channel strip, or to different channel strips entirely.
To remove an effect, hold and drag it out of the Effects section or long-press and tap Delete.
Long-press on an effect in the Mixer to bring up the shortcut popup with options: Delete, Disable, ![]() (toggle bottom-bar visibility).
(toggle bottom-bar visibility).
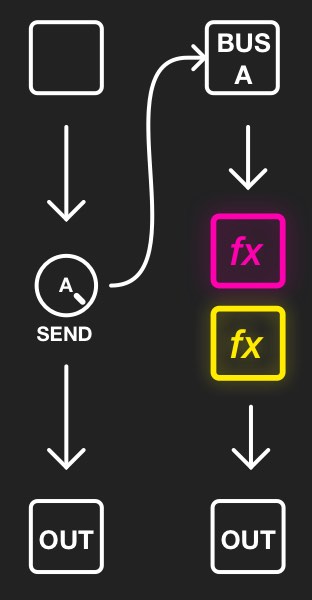
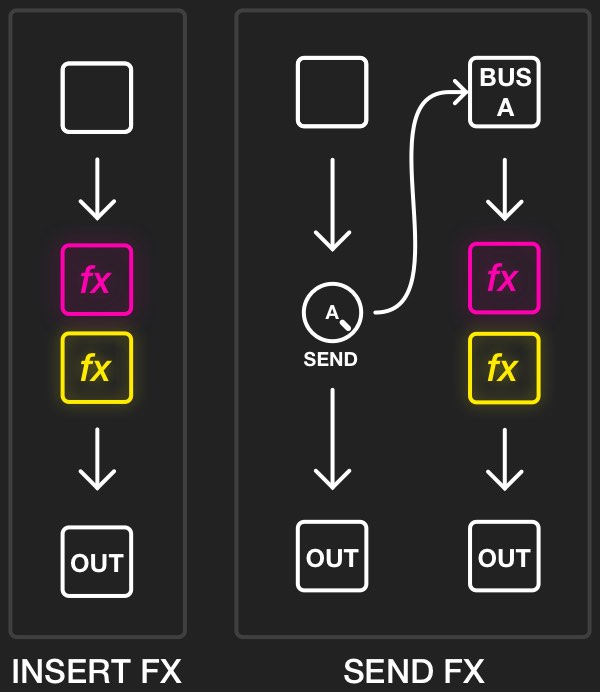 Loopy Pro supports both insert and send effects. Insert effects are applied upon individual channels and affect the audio in situ. Send effects are sent to a bus, a sort of side-channel, and the output is sent to the bus destination. (See Buses and Sends)
When an insert effect is applied to an audio source, the affected audio will be recorded into clip. Insert effects can also be applied to colours, and will affect all audio output by the colour. Effects frequently used as inserts include filters and equalisers, distortion, chorus, limiters and compressors.
Send effects are applied on the output of a bus, to which channels (both audio sources and colours) may send a certain amount of their audio, set by a send knob. The affected audio is heard on top of the original audio stream coming from the original channels. Sends are often used for reverb and delay effects.
Effects can be placed in pre– and post-fader positions. This describes the effect’s position in the signal flow, relative to the volume fader.
Pre-fader effects are applied before the volume fader is applied to the channel: they process the full-volume audio, and then that affected audio is passed into the volume fader.
Post-fader effects are applied after the volume fader: they act on the audio after the volume has been applied, and that affected audio is sent to the output as-is.
Whether you place an effect in the pre- or post-fader position depends on the effect in question. Distortion effects, for example, can behave quite differently with quiet audio versus full-volume audio, and you may want to place these in a pre-fader position to maintain tone at various volume levels. With reverb and delay effects, on the other hand, you may want these to ring out when adjusting the volume, rather than having their output reduced by the fader along with the rest of the channel’s audio, so these may be best placed in a post-fader position.
A performance consideration with pre- and post-fader positions: When you are using the same effect on more than one channel, it’s more efficient to place this effect in the post-fader position for all of the channels. This gives Loopy Pro the opportunity to internally group the channels together and use a single internal instance for the effect. In the pre-fader position, Loopy Pro must use separate internal instances for each channel.
You can use multiple independent instances of any effect, and each instance will be treated entirely separately, with its own configuration and interface. When you tap + to add an effect. The Add Effect popup appears. Any effect already used in the project appears at the top of the list with a letter label that identifies that effect instance.
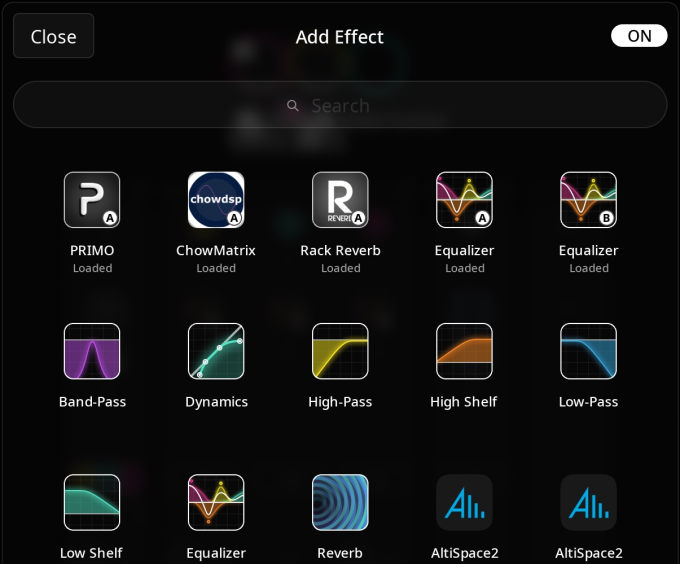
Clones. When adding an effect, you can choose an existing instance from the top of the Effect popup to use a copy/clone of that instance as if it were the same instance. When you do this, the new instance will use the same letter as the previously existing instance. In the user interface, all instances that share the same letter are treated as if they were the same instance with a single configuration and single interface. These clones do not share audio input however. They process the audio sent to them in their respective chains.
The mechanism for these shared instances is a combination of intelligent internal routing – where channels are grouped together and a single effect instance applied to the group – and internal handling of multiple hidden instances. We sometimes refer to these clones as “an instance”, but they are generally clone instances of a plugin.
In most cases, Loopy Pro will create multiple, hidden instances of an effect, and automatically synchronise the state across all hidden instances, so that the effect appears as a single instance. There are rare cases where a single instance is used for all clones, but that only happens when the routing is such that all clones follow the same signal path to the output with no possibility of being separately routed.
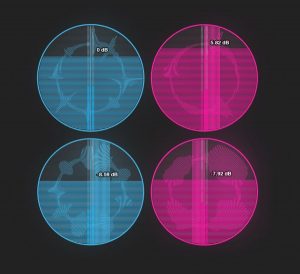
If a cloned effect has a visual component that reflects the input signal (such as a spectrograph or meter), the metering may not reflect the signal going to the clone you are looking at. A single clone is internally marked as the ‘master’ and the visual displays the input to that clone.
See the performance consideration note above, concerning pre– and post fader positions.
By default, effects which are disabled or have no input signal enter “Idle” mode, where they consume little processing resources. With Idle mode, you can have many different Audio Units loaded, without over-taxing your device’s processor. Tap the ON button, or disable the effect on the bottom bar of the main screen or with an action to put the Audio Unit into Idle mode. Tap IDLE or enable the effect from the bottom bar or an action to re-activate it.
If you wish the Audio Unit to remain active when disabled, you can disable Idle mode by long-pressing on the IDLE button, then turning off the switch beside “Enable Idle Mode” on the popover that appears.
When you turn an effect off, Loopy Pro will detect if there is a tail/decay – as with a reverb or a delay, for instance. When a tail is present, Loopy Pro will perform a smooth transition to avoid cutting off the tail: When you disable the effect, Loopy Pro will mute the effect’s input, then overlay the remaining tail on top of the dry, un-affected audio until the effect output becomes silent.
When this transition is happening, you will see the effect bar button/action flashing. Tap again to cancel this transition and immediately silence the tail.
Effects will appear on the bottom bar on Loopy Pro’s main screen by default, for easy access. If you wish to hide an effect from this bar, tap ![]() from the effect’s configuration screen to toggle visibility.
from the effect’s configuration screen to toggle visibility.
Loopy Pro has a number of built-in effects. Here’s a list of the currently-provided effects, and some corresponding notes – see the roadmap for a list of other effects which will be coming soon.
In addition to its built-in effects, Loopy Pro can load AUv3 effect plugins from the App Store.
Tap the icon of an effect, or tap the corresponding button on the bottom bar to display its user interface: This is displayed in a moveable and resizable window.
Tap ![]() or double-tap the titlebar to toggle fullscreen, and
or double-tap the titlebar to toggle fullscreen, and ![]() to close the window. Drag the bottom right handle to change the size of the window. Tap
to close the window. Drag the bottom right handle to change the size of the window. Tap ![]() to dock the window to the side or bottom of the screen. Tap
to dock the window to the side or bottom of the screen. Tap ![]() to undock the audio unit interface.
to undock the audio unit interface.
Loopy Pro supports both factory and user presets for Audio Units. See Presets in Audio Units for details about Audio Unit Presets.
Some Audio Unit effects support MIDI input. The Audio Unit window provides access to the same MIDI tools and options as Audio Unit instruments. See Audio Unit Inputs for details.
Some effects, technically called music effects, may send MIDI as well as receive it. MIDI Guitar 2 is an example of a music effect. To send MIDI from an effect. First, add the effect on the audio channel strip that it will process. Then use the Add MIDI command in Loopy Pro’s mixer to add that effect instance as a MIDI source.
The mixer’s MIDI Channel Strips are for routing MIDI from MIDI sources to MIDI destinations. There are a few MIDI channel strip variants:
Loopy Pro supports full MIDI routing: you can send MIDI from a connected MIDI controller to one or more AUv3 Audio Unit synthesisers/virtual instruments, or drive an Audio Unit synthesiser from an Audio Unit MIDI sequencer. You can also send MIDI out to connected MIDI devices.
Sources. MIDI Colours and MIDI Plugins have a source row that displays the icons of the the channel’s MIDI. You can add a source to a MIDI channel by tapping on the + icon at the bottom of the sources slot. You can also add MIDI sources by tapping the mixer’s + icon and choosing Add MIDI.
Velocity Fader. The fader of a MIDI channel strip scales the note velocities of notes sent through the channel. This will only impact the note volume if the destination synth makes use of MIDI note velocity. Some synth or synth patches are not velocity-sensitive.
Destinations. MIDI Channel strips have two types of destinations: colours and non-colour MIDI destinations: audio clips, MIDI plugins, audio unit instruments, MIDI ports.
In the Destinations section on a MIDI channel strip, tap the + button to add a new destination – this will display a list of the loaded AUv3 Audio Units that can accept MIDI, as well as a list of the MIDI destinations available to the system.
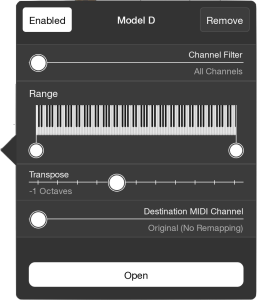 Tap a MIDI Destination (in destination slot) to open its settings.
Options:
Different destinations of the same MIDI source can have different settings here, allowing you to split a MIDI keyboard out to different Audio Units, for instance.
MIDI Colour destinations have a a couple of options unique to MIDI colours:
 Use buses in Loopy Pro to implement effect sends, or to configure custom routing, such as sending the same colour channel to multiple audio interface channels at the same time.
You can add a new bus by either tapping the ![]() button then selecting “Add Bus”, or by adding a new send knob by tapping the + button within the Sends area of a channel strip and tapping “New Bus”.
button then selecting “Add Bus”, or by adding a new send knob by tapping the + button within the Sends area of a channel strip and tapping “New Bus”.
Once a bus has been created, you can create any number of sends from channel strips to this bus, by tapping the + button within the Sends area of a channel strip.
Destinations. Buses can send their output to audio colours, hardware outputs or any other bus..
Sends appear as dials which you can adjust by swiping horizontally – make finer controls by moving your finger vertically away from the dial. You can also use actions to adjust sends from widgets or a MIDI controller.
Long press on a send dial to configure its position:
Remove a send by long pressing and then tapping “Delete”.
 In addition to changing the levels of whole colour groups, you can also adjust the levels of individual clips using the Clip Mixer. This can be useful for gain staging imported content, for instance, prior to applying the colour channel levels.
With the mixer in its simple mode, tap the ![]() button to toggle the Clip Mixer.
button to toggle the Clip Mixer.
You can also enter the Clip Mixer while the main mixer is hidden by long-pressing on the ![]() button on the main screen. Tap it again to hide the Clip Mixer, or keep holding the button to switch to momentary mode, and the Clip Mixer will hide when you release the button, for quick changes.
button on the main screen. Tap it again to hide the Clip Mixer, or keep holding the button to switch to momentary mode, and the Clip Mixer will hide when you release the button, for quick changes.
With the Clip Mixer visible, swipe up or down on any clip to adjust the volume. While sliding, move your finger away horizontally to make finer changes. Swipe left or right to adjust the balance. Double-tap on a clip to set the volume back to 0 dB.
You can adjust multiple clips simultaneously by dragging a rectangle from any empty space over the clips you would like to adjust. Then swipe on any clip to adjust the group.
With the Clip Mixer hidden, you can also quickly adjust the gain of a single loop by dragging your finger in a circle around the perimeter of a loop; a momentary radial fader will appear. Move your finger around clockwise to increase the volume, and anti-clockwise to decrease. Let go to hide the fader.
 The bottom bar on the main screen displays all the effects and audio inputs that you have added to your project.
You can enable and disable modules by tapping in the main area of each button, and you can expand the module’s interface by tapping the ![]() icon – or double-tapping anywhere on the button.
icon – or double-tapping anywhere on the button.
You can also long press on these buttons to switch this behaviour around, so that a tap in the main area opens the module’s interface, and a tap on the ON/OFF button or double-tap will toggle the module.
As you add more effects and inputs, the bottom bar will expand upwards to fit the new items. You can switch the bar to condensed mode by swiping down on any of the buttons – each button will collapse down to a smaller form factor. Swipe up again to switch back to normal mode.
You can also reduce the number of items that appear in the bottom bar by hiding items. Open an effect or source’s interface by tapping the ![]() icon, then tap the
icon, then tap the ![]() icon to toggle hide. You can also choose to hide or show effects by long-pressing the effect in Loopy Pro’s mixer to bring up a popup that gives the option to hide or show the effect.
icon to toggle hide. You can also choose to hide or show effects by long-pressing the effect in Loopy Pro’s mixer to bring up a popup that gives the option to hide or show the effect.
The buttons at the far left and right of the bottom bar can also be hidden by swiping them off the edge of the screen. Bring them back in by tapping the bar handle, or swiping them back in.
 Open the clip detail screen by swiping up on a clip from the main screen, or from the canvas editor by tapping on a clip.
Here you can halve the length of the clip by tapping DIVIDE, and double it using EXTEND or MULTIPLY; Extend will pad with silence, and Multiply will repeat the clip’s contents.
You can import audio to the clip by tapping ![]() , and export the clip’s audio by tapping
, and export the clip’s audio by tapping ![]() , and you can change the colour of the clip with the top right colour selector.
, and you can change the colour of the clip with the top right colour selector.
You can also rename the clip, by scrolling up to the edit field. The clip name will appear on the clip in the main screen.
If the clip is empty, you can define a pre-set length here, and the clip will automatically record for the set length.
Tap the edit button ![]() to open the audio or MIDI editor pain as appropriate for the clip.
to open the audio or MIDI editor pain as appropriate for the clip.
Adjust the start and end points of a clip using the start and end handles on the clip’s waveform. Pinch to zoom in and out.
Fine adjustments. The trim handles will initially snap to beat boundaries when dragged. You can adjust the coarseness of the adjustment by dragging up or down (whichever is most convenient). If you vertically drag a little bit, you will be switched to coarse adjustment which is finer than the initial beat snapping. Drag farther vertically and you switch to fine adjustment. Text below the waveform indicates the current adjustment mode.
Scrubbing. If your clip is not Phase Locked (see below), then you can tap and drag the playhead around to change the playback position.
If the audio has been imported, you can set the original tempo by either dragging the jog wheel, tapping the ÷ or ⨉ buttons, or tapping in the middle of the jog wheel and typing in the tempo. The clip will be time-stretched to fit your project’s tempo. If this is the first clip of your project, then your project’s tempo will be adjusted instead.
As you move the start and end points using the waveform handles, Loopy Pro will suggest a tempo that corresponds to a whole number of bars. Tap the suggestion to apply that as the clip’s original tempo.
If you inset the start or end point inwards, you can assign the preceding or following audio to be an intro or outro, respectively. These sections will play before or after the loop is started/stopped.
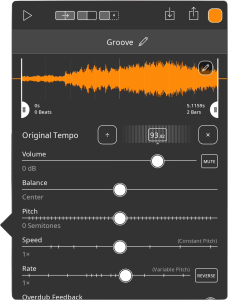
You can also adjust the clip’s parameters: volume, balance, pitch, playback speed and rate, and overdub feedback.
Each of these parameters can also be defined at the colour level, and the parameters combine between levels. You can – for example – gain-stage each clip, but still modify the overall level and balance of all clips of the same colour (remember: colours are like tracks in a traditional DAW).
You can adjust any of these parameters via the Adjust Parameter action, for control with a MIDI controller, an on-screen widget or a Follow Action.
The “Speed” parameter determines how fast the track plays back, while keeping the pitch constant. When you adjust the speed, Loopy Pro will perform a high-quality time-stretch operation in the background, while playing the clip using a live time-stretch operation. When the time-stretch processing is complete, Loopy Pro will switch the new audio over.
The “Rate” parameter also determines how fast the clip plays, but the pitch of the clip will vary as you change the rate, just like tape or vinyl. You can use the rate parameter to reverse the track, by setting a negative rate, or tapping “Reverse”.
Like the other parameters, speed and rate are applied in addition to the settings at the colour-level – for example, if you specify a playback rate of 2.0x at the colour level, and 0.5x at the level of a particular clip, the clip will be played at 2.0 times 0.5: 1.0x.
When you adjust the playback speed or rate of a clip, Phase Lock (see below) will automatically be disabled, and the clip may go out of time with the rest of the project, as it’s playing at a different speed. You can turn on Phase Lock again and the clip will jump back to a synchronised position. You can also use the Phase Align action to perform this change, controlled by a MIDI controller, on-screen widget or Follow Action.
Also known as “Decay”, this parameter defines how much of the current audio of a clip is carried over into the next overdub layer, while overdubbing.
Set to 0% to enter “replace” mode, where all existing loop audio is replaced by new audio. Set to 100%, the default, to mix all existing layers with new layers.
In Loopy Pro 2.0, Overdub Feedback applies only to audio clips.
Here, you can set a loop to be either phase locked or free. A phase locked loop will lock its playback position to the main timeline, even when it is not playing. When you start a phase locked loop playing, it will begin playing at a position determined by the overall timeline. A free loop, on the other hand, will always play from the start, regardless of the current timeline position.
You can define whether a loop will play continuously (Loop), or play once and stop (Play Once). This setting can also be defined for an individual action, for triggering by an on-screen button or a MIDI controller.
You can override the clip settings, by turning on the switch beside “Playback Settings” or “Recording Settings” override. You can also open either the global- or colour-level clip settings from here, for convenience.
Set up clip Follow Actions in conjunction with Loopy Pro’s powerful actions system to perform actions when certain clip events occur, and to implement sidechaining with the Amplitude Envelope follow action.
You can also configure clip gestures here, which will override the global- and colour-level settings. You can configure the actions which are performed when you tap, two-finger tap, long press, or swipe or long swipe in any direction.
Audio clips (loops and one-shots) can be targeted from MIDI sources and played as polyphonic MPE rompler/samplers. The clips can be treated as pitched notes or slices.
To set up a clip as an instrument:
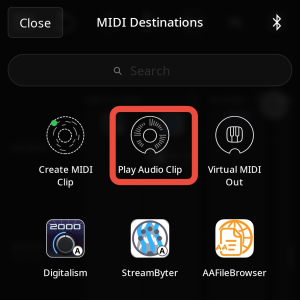
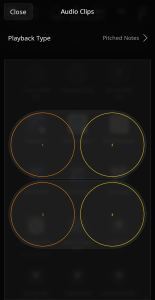
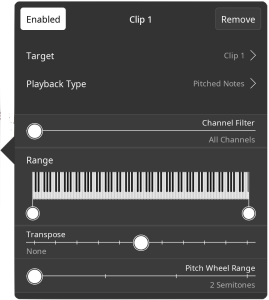
You can change the playback type in the destination options and set the pitch bend range. The default value is 2 semitones. Use 48 semitones when using an MPE controller.
Watch this quick tutorial.
Loopy Pro provides editors for audio and MIDI clips. To access a clip’s editor, click on the pencil icon in a clip’s details panel or use the Clip->Show Editor action. By default, the editor window is docked but can be made free-floating by tapping on ![]() .
.
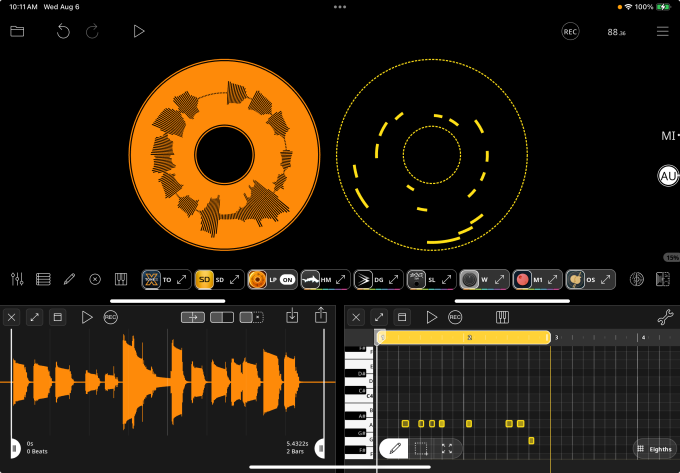
Loopy Pro’s audio editor is a streamlined non-destructive editor that provides the following functions:
The MIDI editor provides the same clip editing functions as the Audio Editor as well as a simple piano roll editor for editing recorded notes.
The piano roll currently provides note editing only. It is not yet possible to edit non-note MIDI data recorded in the clip. To edit non-note MIDI, export the clip for editing in another sequencer. Exporting a clip exports all the MIDI data as a MIDI file that can be opened in a more comprehensive MIDI editor. If your clip has note and non-note data in it, moving notes will not move the non-note events and will cause the note and non-note events to be out of sync.
These gestures are active in all modes:
When the grid is on, note placement and dragging is locked to grid points. Turn the grid off to have no grid restraints. The grid options are: Auto (zoom level dictates the grid points), eighths, triplets, sixteenths, 16th triplets, 32nds, 64ths, none
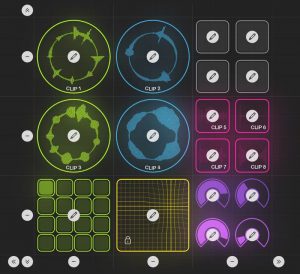 Loopy Pro’s canvas allows you to create your own project layout, with any number of loops, one shots, buttons, dials, sliders and other controls. With a rich system of actions, you can set up on-screen widgets to control every aspect of the session, on a variable-size canvas that can also be split over multiple different pages.
To access Loopy Pro’s canvas editor, tap the ![]() button from the main screen. The grid will appear by default, accessed by the
button from the main screen. The grid will appear by default, accessed by the ![]() button on the bottom toolbar.
button on the bottom toolbar.
On the grid, you can move and scale elements; select multiple elements at a time by dragging a rectangle from any blank space, and then move them as a group.
Copy elements by selecting them, then tapping “Copy”; paste them by tapping in a blank space, and then tapping “Paste”. You can copy and paste between projects, and even between different devices using iOS’s Universal Clipboard feature.
You can add rows or columns to the canvas by tapping the ![]() ,
, ![]() etc. buttons, and remove them and their contents by tapping the
etc. buttons, and remove them and their contents by tapping the ![]() buttons.
buttons.
Along the bottom of the canvas are the elements which can be added. Tap an element to add it to the canvas. The following sections describe the elements that can be added to the canvas, and their configuration.
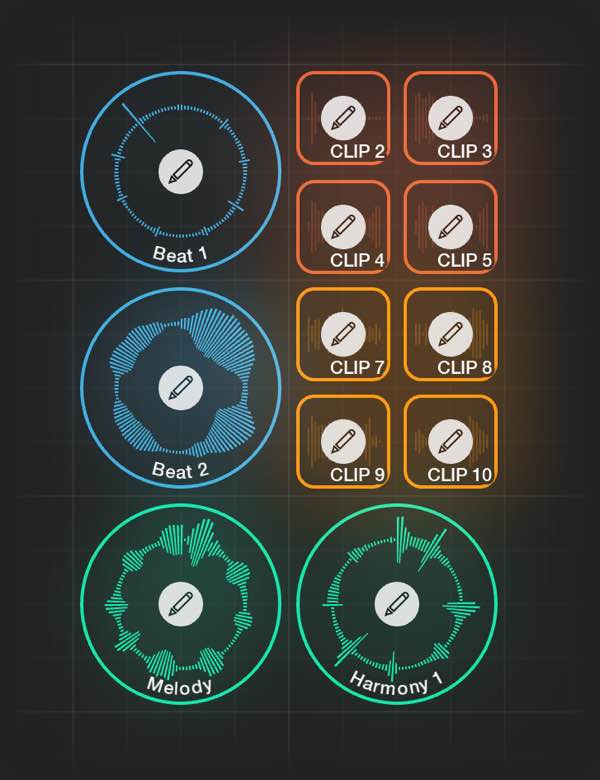 Add audio clips – loops and one shots – to the canvas by tapping
 ![]() or
or ![]() . Add MIDI clips by tapping
. Add MIDI clips by tapping ![]() or
or ![]() . MIDI objects generally have dotted lines.
. MIDI objects generally have dotted lines.
Clips can be any size; loops will appear as rectangles if they are a non-square aspect.
Once a clip has been added, tap it to open the clip’s detail screen.
You can also assign colours and group clips.
Widgets are controls that you can add to your project layout, and configure to perform any number of actions to control the session. This allows for a very deep level of configurability and customisation – you can essentially make your own user interfaces using widgets.
Each widget type has a large number of action triggers associated with it; a button, for example, has Press, Release, Toggle, Double-Tap, Long Press, Two-Finger Tap, Swipe, and so on. A dial also has a Value Change trigger, in addition to Press, Release, Double-Tap and Two-Finger Tap. Each on-screen element, therefore, can trigger a large number of different actions depending on gesture, providing for very space-efficient control schemes.
You can define a single action per trigger, or a number of actions which can be performed in a sequence.
You can also trigger widgets via a MIDI controller, so you can mirror your on-screen layout on a MIDI controller of your choice. You can even trigger widgets from other widgets, to create complex functionality, and even libraries of functions.
Widgets can have labels (with support for emoji), as well as different colours.
Loopy Pro is equipped with a state feedback system that can keep widgets’ visual states in sync with the elements they control. For example, if you have a button that turns an effect on or off, the button will reflect the effect’s state even if a MIDI binding was used to toggle the effect.
Options. For some widget types, there are options to customize how state feedback works. In the widget edit panel, tap the gear wheel icon if there is one to set the options
For more details about how state feedback works see this wiki article.
The remainder of this section will describe the different types of widgets currently available. More widget types will be rolled out as Loopy Pro develops. (See the roadmap for details). See the available actions which can be triggered from widgets.
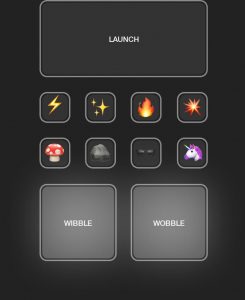 Buttons perform actions on press or release, as well as supporting a number of other gestures.
Create a button on the canvas with the ![]() toolbar button in the canvas editor.
toolbar button in the canvas editor.
You can configure a button to, for example, enable an effect on press, and disable it on release, or set a send to 100% on press, and gradually ramp it back to 0% on release. Or you could set up a number of buttons to act as scene launchers, each set to trigger a particular set of clips. A button could perform a cross-fade between one set of clips and another, with a configured interval. Or you could set a button to load the next project in a set.
Buttons provide the following triggers:
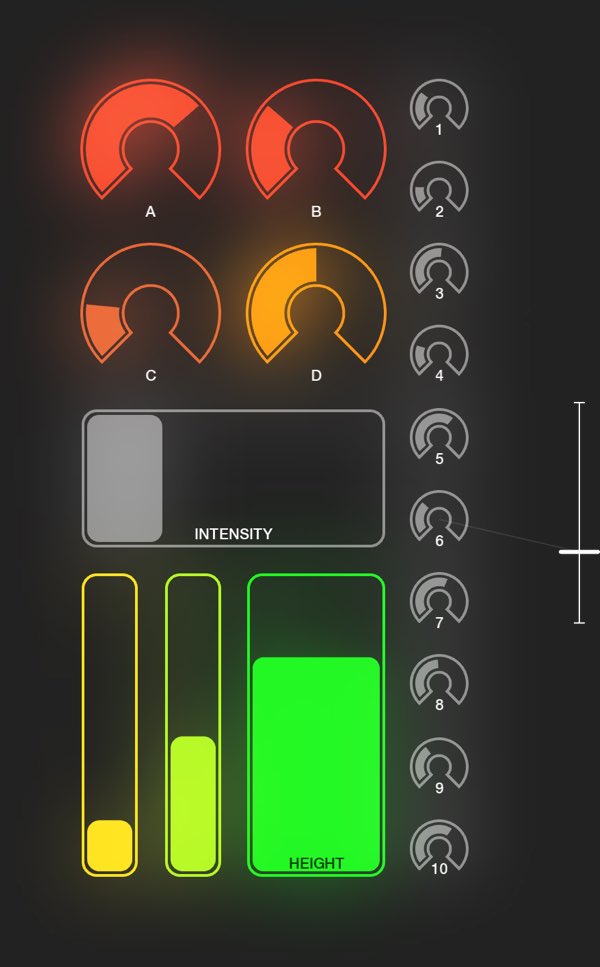 Slider, dial and rotary encoder widgets perform continuous value actions as their values are adjusted. Their visual states update to reflect the underlying action values.
Adjust a slider or dial’s value by dragging up and down, or left and right for horizontal sliders. For finer control, move your finger away from the dial and use the virtual fader that appears.
![]() Rotary encoders are adjusted by circular movements and can be used for relative adjustments such as clip offset and for sending relative MIDI.
Rotary encoders are adjusted by circular movements and can be used for relative adjustments such as clip offset and for sending relative MIDI.
Create dials on the canvas with the ![]() toolbar button, and sliders with the
toolbar button, and sliders with the ![]() and
and ![]() buttons. Create rotary encoders with the
buttons. Create rotary encoders with the ![]() button.
button.
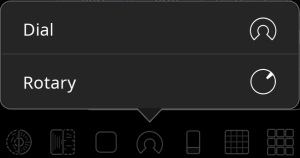
If the screen is narrow, the rotary encoder is not shown. Tap on the dial icon to pop up the dial/encoder selector when this is the case.
Horizontal and vertical sliders. Sliders are horizontal or vertical based on their aspect ratio. If a slider is wider than it is tall, it will be horizontal. If a slider is taller than it is wide, it will appear as a vertical slider.
These widgets provide the following triggers:
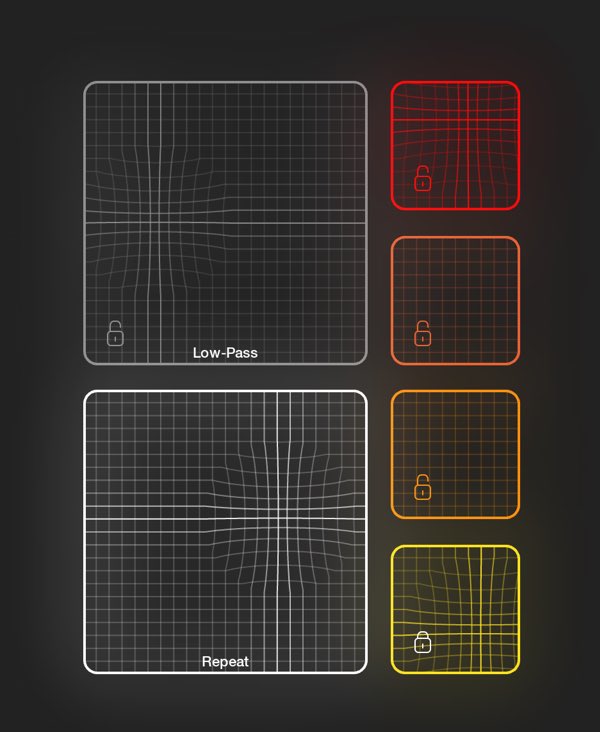 X-Y Pads give two-dimensional control over a pair of continuous value actions.
Create an X-Y pad by tapping the ![]() button on the canvas editor toolbar.
button on the canvas editor toolbar.
Loopy Pro provides a configuration screen to map an X-Y pad to a loaded effect. Once you add an X-Y pad, its configuration allows you to choose an effect, and then select which parameters of the effect are controlled by each axis.
You can configure an X-Y pad to operate in two modes: Always On, or Hold. In Hold mode, the effect will be enabled on touch, and disabled upon release. You can tap the ![]() button on the pad to lock or unlock the pad temporarily.
button on the pad to lock or unlock the pad temporarily.
You can also customise an X-Y pad’s actions to perform any continuous action you like. You could, for example, use an X-Y pad to send a pair of MIDI CC messages to some external MIDI gear, or an AUv3 Audio Unit.
In custom mode, X-Y pads provide the following triggers:
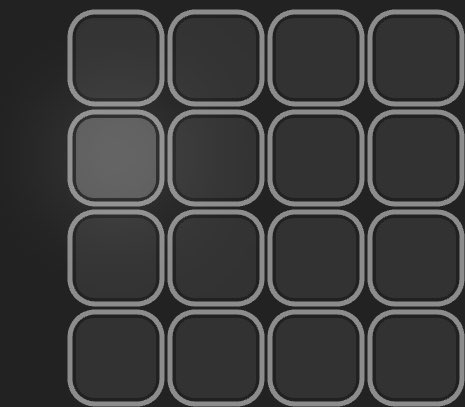 The Clip Slicer/Button Grid is a special widget type – the first of many to come – that provides an interface for a specialised clip function.
Create a Clip Slicer/Button Grid by tapping the ![]() button on the canvas editor toolbar.
button on the canvas editor toolbar.
Configure the Clip Slicer with an individual clip, and it will allow you to play individual slices of the clip using the pads, either divided by transients in the clip, or divided evenly across the clip.
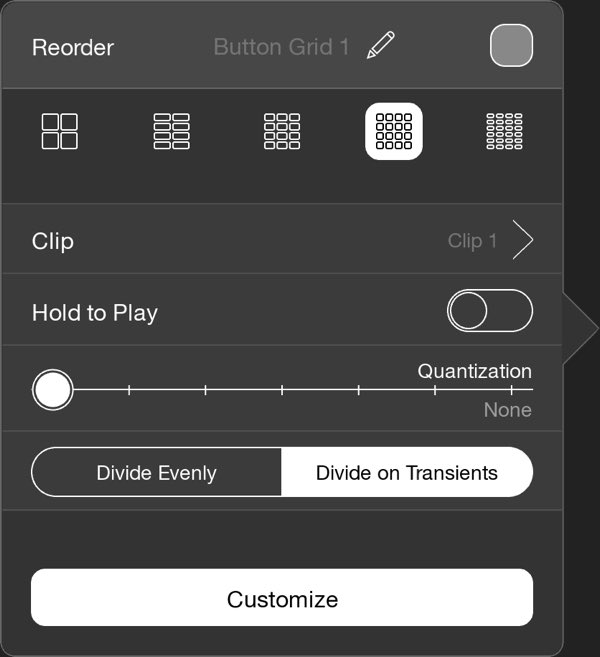
You can configure the Clip Slicer for various sizes, from 4 pads up to 24; turn on or off Hold to Play, and customise the quantisation, so that segment playback is synchronised with the timeline.
You can also put the button grid into custom mode, and completely customise the behaviour of each pad. Each pad offers Press, Release, and Hold/Release triggers.
Radio Buttons and Stepped Dials are both versions of “List” widgets, which allow you to specify a number of different elements, each with associated actions, and switch between them. Radio Buttons are created from the Clip Slicer/Button Grid/Radio Button selector ![]() in the canvas toolbar. Stepped Dials are created by tapping
in the canvas toolbar. Stepped Dials are created by tapping ![]() in the toolbar.
in the toolbar.
Radio Buttons and Stepped Dials are made up of selectable items that can be triggered by turning the dial or selecting a button. The currently selected item can be triggered by an action from another widget or a MIDI binding. Stepped Dials and Radio Buttons can be set to perform their actions on change or only when activated later by another widget, MIDI Binding or other action source.
Typically, the list items (the dial steps or individual radio buttons) are created one of two ways:
Important State Feedback Note! The state feedback setting discussed later in this section has a big impact on the behavior of Stepped Dials and Radio Buttons. Normally, these widgets adjust themselves to reflect the state of the actions and objects they control. Sometimes, this behavior is undesirable. When you want a dial or radio button’s active item to always reflect the last selected step, set State Feedback to Disabled in the widget’s settings ![]() .
.
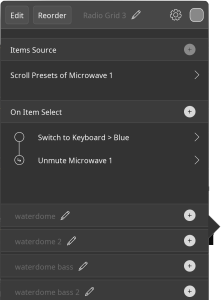
Use Item Source to use the list widget to fill its items using a select action such as Select Audio Unit Preset or the Send MIDI Message. Tap + to choose the action that will fill the list. When the select action is set up, the dial or radio button group will be set up with the number of buttons or steps needed and will feature appropriate labels.
On Item Select. The On Item Select actions are performed when a list item is selected. These are useful for tasks such as enabling a synth or effect when one of its presets is selected.
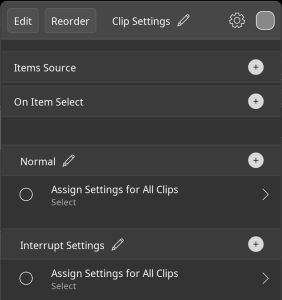
Items (dial steps and radio buttons) can also be manually entered. An item can performs one or more actions when the item is triggered.
When an item is triggered all of its actions are performed. The image above shows a dial with 2 items that have one action in each item. Items can contain as many actions as needed.
Select/Deselect sub-items. Items can have Select, Deselect, or Select/Deselect actions. The actions in the select section are triggered when the item is selected. The Deselect items are triggered when a different item becomes selected. Different Select and Deselect actions are useful when something special needs to be done when switching away from the step.
Gestures (Stepped Dial only): Press, Release, Double-Tap, Two-Finger Tap
There are a few important settings that determine the widget’s behavior and appearance.
By default, when you press a radio button or change a dial selection, the item actions are performed immediately. There are options to customize the behavior. Access the options by tapping ![]() in the widget editor.
in the widget editor.
The options are:
When Perform Action On Activation Trigger is turned on, selecting a dial step or radio button prepares the widget to act. The action isn’t executed when the step changes. It waits to be activated. The widget can be activated by double-tapping it OR by using an action which could be executed by another widget, a follow action or a MIDI binding. To trigger a stepped dial or radio button with an action, use the Trigger Widget action. Set the target to the widget you want to trigger. As the sub-action, choose Activate Current Value/Retrigger .
The font size used for the widget’s text.
When State Feedback is on, Loopy Pro will automatically adjust the selected step or radio button selection to reflect Loopy Pro’s state. For example, if you have a preset selector dial and change the preset without the dial, Loopy Pro will adjust the dial to reflect the current preset. Because the selection affects the widget’s behavior when triggered, it is important to make sure that this setting is set appropriately. In many cases, you will want this to Disable
The options are:
Labels allow you to add text to your project’s canvas. You can change the font size, weight and colour, and longer content will word-wrap, and scroll if the label widget is smaller than the text, which means you can also use labels for longer passages, such as lyrics or set lists.
Add a label to the canvas by tapping the ![]() button on the canvas editor toolbar.
button on the canvas editor toolbar.
By default, labels are non-interactive and can be overlapped on top of other canvas elements without interfering with their function. But you can also add actions to label widgets, just like buttons.
Label widgets provide the same set of triggers as button widgets:
 You can create any number of separate pages for your project, and switch between them using the page selector on the main screen, or via an action, from a button or MIDI controller.
When in the canvas editor (![]() button), you can create a new page by tapping the
button), you can create a new page by tapping the ![]() on the page selector, or long press to determine how the new page should be created:
on the page selector, or long press to determine how the new page should be created:
After you make a selection, new pages will be created the same way until you make a different selection.
Long press on a page label in the selector to delete the page, or to rename it – you can use a single letter or number, or an emoji, to represent the page.
Reorder pages by pressing then dragging.
Pages can behave purely as an extension of the canvas, or as actual content containers. With page actions, you can switch all loops on a page on or off, or solo an individual page, to behave like scenes of clips.
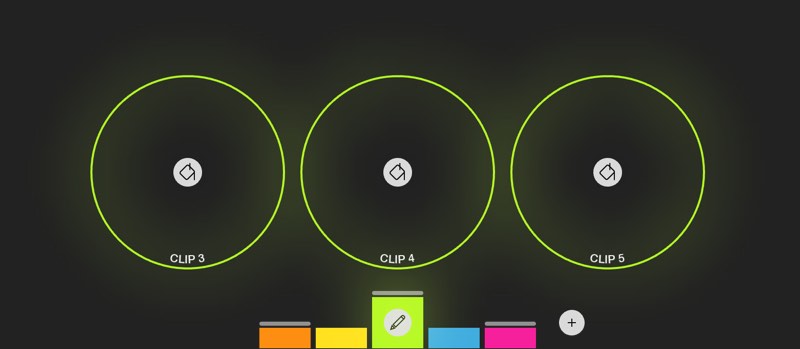 Assign colours to clips using the Colour Editor by tapping the
 ![]() button on the editor toolbar.
button on the editor toolbar.
Select a colour from the colour swatch at the bottom, and then tap or drag your finger over tracks to assign that colour.
You can add new colours by tapping the ![]() button to the right – these will automatically appear in the mixer. Loopy Pro will add new colours in an order that attempts to maintain the maximum visual distinction between colours, and will keep them ordered by hue.
button to the right – these will automatically appear in the mixer. Loopy Pro will add new colours in an order that attempts to maintain the maximum visual distinction between colours, and will keep them ordered by hue.
Colours which have been assigned to clips will be displayed with a grey bar above the colour swatch; empty colours have no grey bar.
Long press on a colour swatch to delete that colour.
Tap ![]() on the selected colour swatch to edit the settings for that colour – you can access the same screen by opening the menu at the top right of the screen and tapping “Color Groups”.
on the selected colour swatch to edit the settings for that colour – you can access the same screen by opening the menu at the top right of the screen and tapping “Color Groups”.
Here, you can rename the colour and, just like the clip detail screen, edit the colour’s parameters: volume, balance, pitch and speed. You can override the global clip settings, by turning on the switch beside “Playback Settings” or “Recording Settings” override.
You can also set up clip Follow Actions in conjunction with Loopy Pro’s powerful actions system to perform actions when certain clip events occur, and to implement sidechaining with the Amplitude Envelope follow action.
And you can configure clip gestures here, which will override the global settings. You can configure the actions which are performed when you tap, two-finger tap, long press, or swipe or long swipe in any direction.
Loopy Pro provides a number of different ways to define groups of clips, for near limitless customisability in defining song structure.
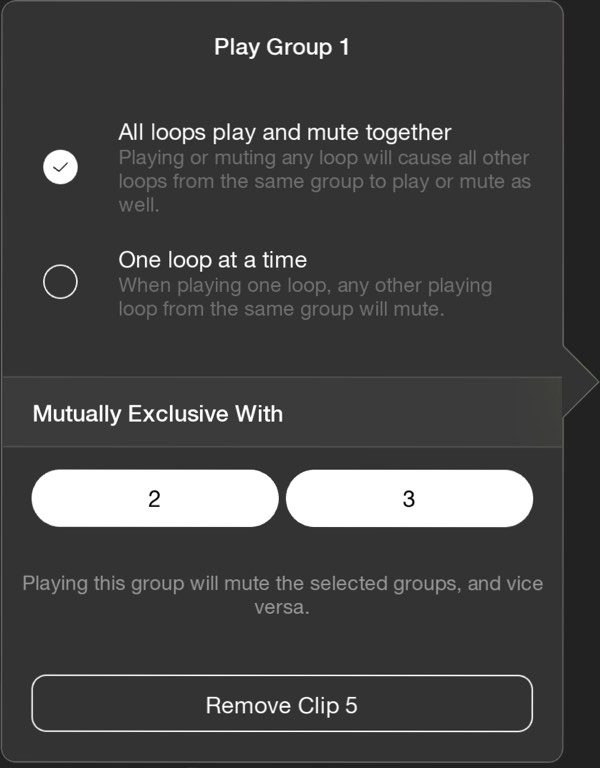 Play Groups are the most straightforward grouping mechanism.
Create and configure Play Groups by opening the canvas editor by tapping the ![]() from the main screen, then tapping the
from the main screen, then tapping the ![]() button to open the Play Groups editor. Here, you can drag loops together, or drag a rectangle around a set of loops, in order to create groups.
button to open the Play Groups editor. Here, you can drag loops together, or drag a rectangle around a set of loops, in order to create groups.
Tap a loop that’s in a Play Group to open the settings for that group. You can configure a group so that starting or stopping any loop in the group will start or stop all the other loops, or so that only one loop in the group will play at a time.
You can make groups mutually exclusive with each other, so that starting one group will stop the others.
You can also create your own completely custom groupings by using actions.
For example, to create a clip/scene launcher layout where loops in rows play together, you could create a column of button widgets, each bound to a solo action, with the clips in each row targeted, and “All Loops” set as the Solo Context. You can see this configuration in the “8×8 Scenes” sample project provided with Loopy Pro.
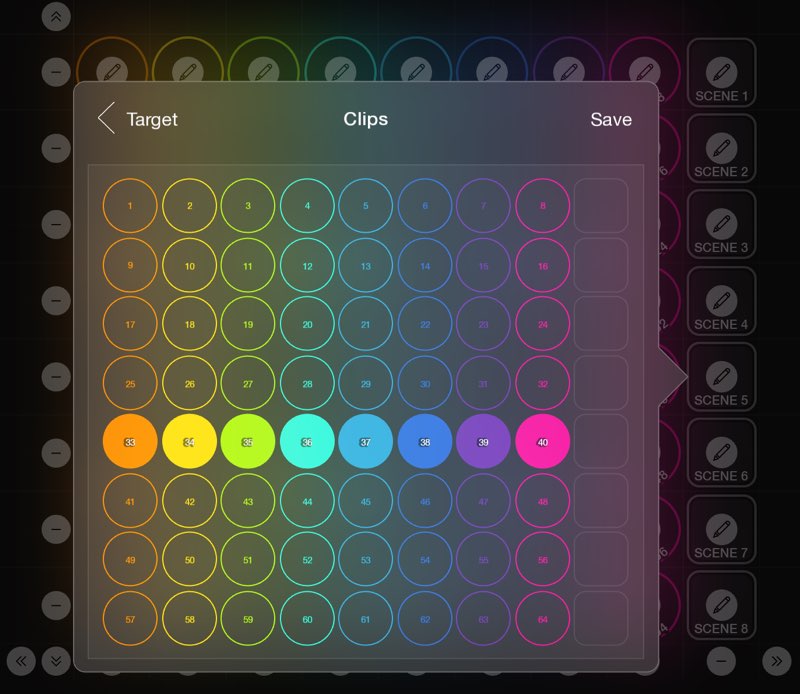
You can also create button widgets bound to the play action, with an arbitrary selection of clips, to create any kind of sectioning you wish.
You can also use clip play/stop Follow Actions to trigger play/stop actions on other clips whenever a clip is started or stopped.
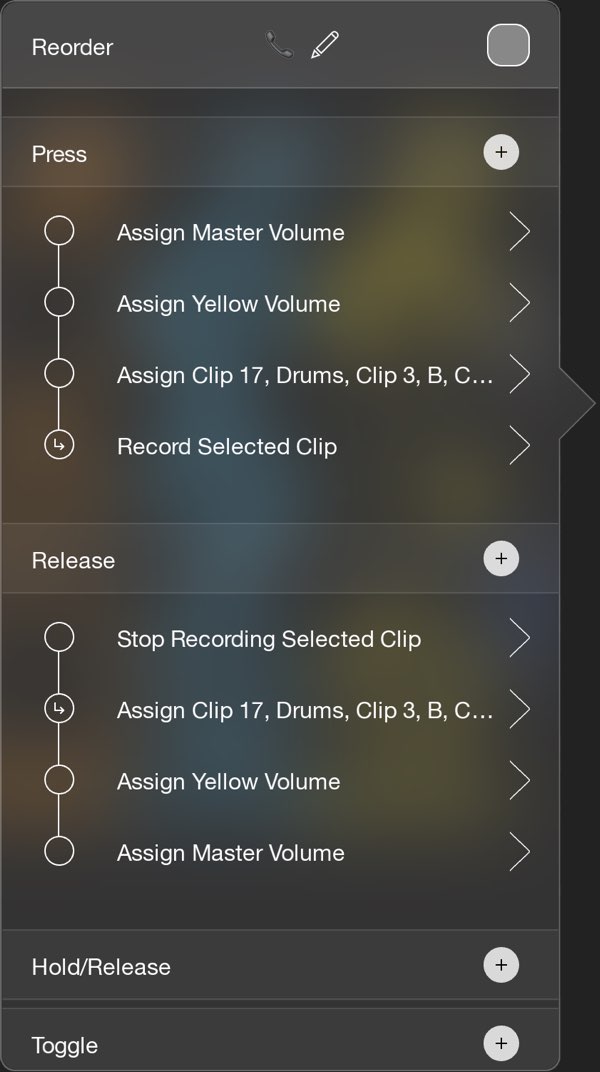 Loopy Pro’s powerful actions system provides for endless customisation of project layouts, and deep control via MIDI controllers.
Everything in Loopy Pro can be accessed via actions, which you can attach to on-screen widgets, like buttons and dials, or bind to triggers on a MIDI controller. You can assign actions to gestures, or to Follow Actions.
Actions include controls for clip playback and recording, and audio parameters like volume, balance, pitch and speed. There are actions to adjust effect parameters and sends, play and stop the master clock, adjust input gain and enable/disable inputs, change tempo, and much more.
With actions and widgets, you can essentially make your own audio production apps within Loopy Pro – effortlessly – and with a MIDI controller you can build your own looping setups, to suit your individual style.
Copying/Duplication Actions. Long-press on an action to Duplicate or Copy the action. After copying an action, long press on a target’s section header to paste the copied action. Long-press on a section heading to copy all of the actions in the section.
Re-ordering actions. Wherever actions are found, there is a Reorder button that allows you to change action order by dragging.
Deleting actions. To delete an action, swipe left on the action to expose the Delete action button. This is the standard iOS list item delete gesture.
For impulse action types, an additional circle button control is shown to the left of each action. Tapping this will display the timing/sequence controls for the action.
Use the Delay/Quantization slider to set when the action occurs. Delay will cause the action to occur after the given delay; Quantization will cause the action to occur in sync with intervals of the given quantum. Use Quantization to perform an action on the beat, for instance. Note that, for example, an action with Quantisation set to 1 beat, which is invoked on a beat boundary already, will have no delay at all.
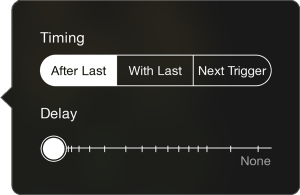
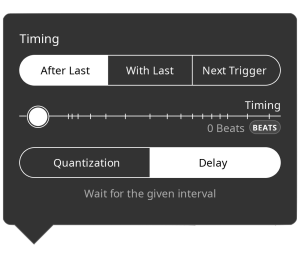

Delay/Quantization Time Units: In Loopy Pro 2.0, a choice of time units was added. Delays and quantization can be set in terms of musical time or absolute time. When you set the Delay/Quantization slider, beats or secs will appear indicating the time unit. Tap on beats or secs to switch units.
Actions come in a number of different types, and are suited to different purposes:
Depending on the control, different actions will be available. A dial widget will allow you to bind continuous actions to it, and a button’s Press action, or a MIDI Controller Program Change trigger will only allow you to bind Impulse actions, while a button’s Hold/Release trigger will accept boolean actions.
Saving/Restoring Values With Actions: Actions with the word Adjustment in their name generally provide options to assign, nudge, restore, save, and toggle values. When using the Save and Restore options, there is also a slot number into which you can save and restore the value. Trigger Widget actions may also have Save/Restore options.
The remainder of this section will describe all the actions currently available within Loopy Pro. This list is likely to grow as Loopy Pro develops further.
Actions that operate on clips.
Loopy Pro provides a set of “Select” actions which control on-screen selection of clips. Selected clips appear on-screen with a white dot, and can then be used as an action target, allowing you to use the same action on whatever clip is selected. There are actions to select the next and previous tracks, in left-to-right, top-to-bottom order, as well as actions to select tracks to the left, or right, above, and below.
The select targets Next Clip, Previous Clip, Clip Above and Clip Below apply to the current page. If the currently selected clip is on another page, the selection will move to the current page. The selection actions wrap. Select Next Clip, for instance, will select the first clip if the currently selected clip is the last on the page.
Select None. There is not currently a select ‘none’ option. Once the select action has been used, there will always be a selected clip. You can select a clip on a different page, if you are not using selected clip as the target and don’t want to see the selection dot.
The following targets are supported by clip actions:
Start or stop a clip playing.
Parameters:
Stop other clips playing when a clip is started, with a configurable context defining which other clips will be stopped.
Parameters:
Silence a clip’s audio output; clip may continue playing, but silently.
Parameters:
Start or stop recording a clip.
Parameters:
Adjust volume, balance, pitch, speed, rate, overdub feedback or input gain for one or more clips.
Parameters:
Move through the clip, either continuously via a continuous input like a slider, jump to a specific position or nudge back/forward through the clip.
Clear all audio content from a clip.
Parameters:
Copy or move the audio content from one clip to another, mixing audio with the destination clip
Parameters:
Extend the length of the clip by a factor of two.
Parameters:
Truncate the length of the clip by a factor of two.
Open the clip’s detail screen.
Show the audio or midi editor of the targeted clip.
Select a clip (see “Clip Selection” above).
Realign a clip’s playhead to be in synch with the other clips and the clock. This action is necessary when changing a clip’s speed/rate since such changes generally put a clip out of alignment with the other clips and clock. It can also restore a clip to being phase-locked which is necessary after a speed/rate change since such changes will turn off phase-lock. This action is also useful with free loops when reversing a clip in order to realign it with the clock.
You can specify:
This action shifts offsets (“rotates”) a clip’s audio. When used with an impulse action (a button widget or other impulse-type event), the clip is rotated so that the old start point aligns with the clock position at the time that the action is executed. As a continuous action (such as from a fader, dial or rotary encoder), shift the start point by an amount determined by the controller/widget.
For example, if you have a recording of a quarter note count “1 2 3 4” and execute the action on beat 3, the clip gets rotated so that “1” now happens on beat 3. The new clip will be “3 4 1 2”.
Parameters (continuous mode only):
Immediately Reverse the clip’s playback direction. This is the same as multiplying the Rate by -1. If a loop is phase-locked, the Reset Phase option will adjust the clip phase to remain clock-aligned which may require the playhead to jump.
Action: Toggle, Reverse, Forward
Option: Reset Phase. If a loop is phase-locked, the playhead will jump to stay aligned with the clock.
To perform phase-aligned reverse with a free loop, do not use the Reset Phase option. Immediately after the Reverse Clip action, use the Phase Align Clip action with the following settings:
Remove the top overdub layers of a clip, or replace them. This behaves a little like undo/redo for a particular clip.
Parameters/Options:
Cancel any recording or playback count-ins or count-outs that are in progress. This applies to all clips in a project.
Assign new playback and recording settings. You can assign/override any or all clip settings. Exactly how the assigned settings are applied depends on the target. Assign Clip Settings works the same as if you performed the changes manually by changing global, color or individual clip settings.
When the target is All Clips, the chosen settings become the global clip settings seen when you choose Clip Settings from the main menu. When assigning to All Clips, the new settings do not change any settings overridden at the color or individual clip levels. Assigning settings to All Clips does not change any settings overrides performed at the individual clip level.
If a color is the chosen target, the chosen overrides will be added to setting overrides of the color.
If the target is a specific clip or clips, the settings are assigned as overrides of the settings inherited from the global and color settings. When settings are overridden at the individual level, those settings are not influenced by any changes to those settings at the global or color level. To change the override settings, you must change them at the clip level. Targeting All Clip, does not remove or change settings made at the individual level.
Actions that operate on colours.
See Clip Play/Stop, above.
See Clip Solo, above. Note that this action operates on the clips of this colour, and starts/stops the clips as required. This is a different action from Mixer Solo below, which operates on the mixer channel strip.
Solo or unsolo the colour channel in the mixer.
Parameters:
Mute the output of a colour.
Parameters:
See Clip Adjust Parameter, above.
This is the same as the clip Play/Stop action. It was added as a convenience as it simplifies selecting a play group since there are no other options.
This action lets you change a play group’s mode. The modes are: all clips play/stop together, one loop at a time, loops play independently.
Toggles the effect on or off. When off, the effect is bypassed.
Parameters:
Adjust a parameter value.
Parameters:
Load a saved preset for an effect. Presets can be provided by the effect manufacturer, or user presets you create.
Show the user interface for the effect. If the effect is built-in or AUv3, opens a window to reveal the effect. If the effect is an Inter-App Audio app, switches to that app.
Parameters:
Mutes or unmutes the source, with an optional ramp for a smooth fade in/out.
Parameters:
Soloes the source, muting all other channels.
Parameters:
Adjust gain, input gain or balance. Input gain is gain applied before the signal reaches the mixer. Input gain is primarily used to adjust the input level received from hardware inputs to simplify matching input levels.
Parameters:
Enable, disable, switch or toggle a MIDI destination. Use this action to control which possible MIDI destinations are enabled for a MIDI controller. This action allows you to have multiple possible destinations of a controller and enable particular destinations without the need for multiple channel strips
Parameters:
Show or hide an Audio Unit plugin window.
Adjust a parameter for an Audio Unit plugin.
Parameters:
Activate a preset for an Audio Unit plugin.
Open a Loopy Pro on-screen keyboard widget. Use this to open any Loopy Pro on-screen keyboards available in the mixer.
Parameters:
Mutes or unmutes the bus, with an optional ramp for a smooth fade in/out.
Parameters:
Soloes the bus, muting all other channels.
Parameters:
Adjust gain or balance.
Parameters:
Activate a widget’s functions.
Parameters:
Switch to another page.
Parameters:
Copy the layout and optionally content of the current page to a new page.
Parameters:
Toggle, pause or unpause the timeline.
Parameters:
Move the sequencer timeline’s playhead. The position can be determined in terms of bars or sections.
A section is a timeline region where all the events remain unchanged as illustrated below.
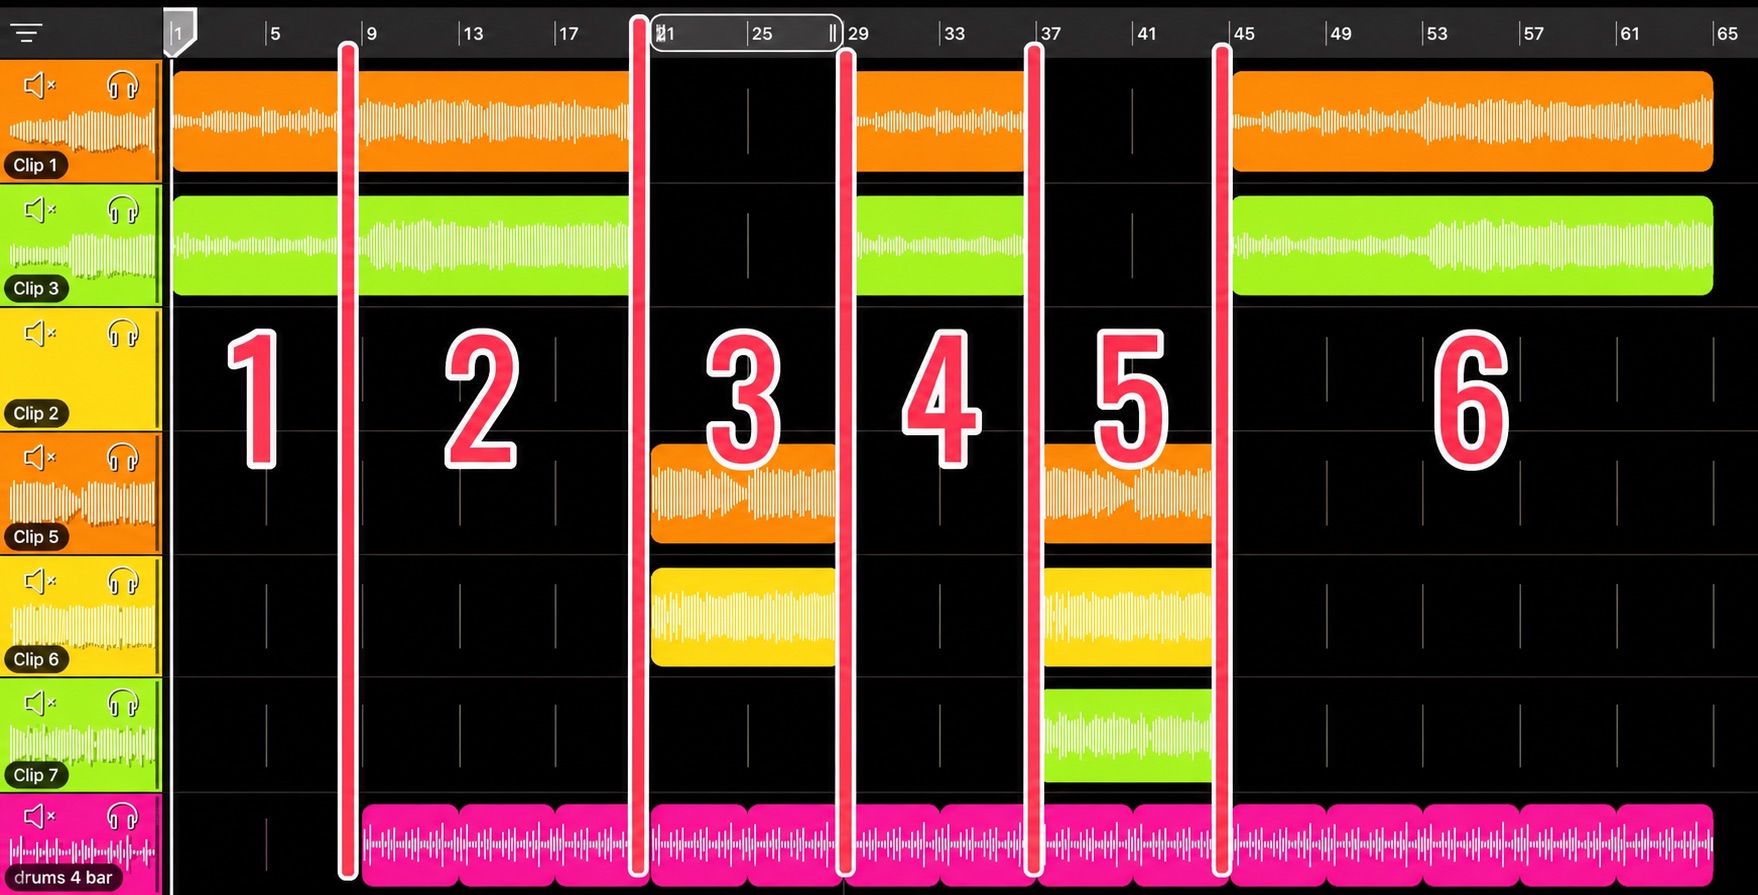
Parameters:
Reset Loopy’s clock position. Typically, this action is used with free loops to allow the clock to be re-aligned when switching between loops of different lengths if you need the loops to be lined up with the master cycle.
Phase-Locked Loops! Phase-locked clips will be offset (rotated) to stay aligned with the new clock phase when you use Phase Align Clock. Use this action with care when there are phase-locked loops in your project.
In Loopy Pro 1.x, the clock is reset to the start of the master cycle.
Parameters (to be available in 2.0):
Update the tempo by tapping out a new one (for impulse triggers only).
Halve or double the tempo without affecting clip playback. This action is equivalent to manually triggering the Tempo Correction options available in the clock settings panel.
Modify the current tempo.
Parameters:
Change the current time signature with an option to keep the bar duration. Note that Loopy Pro time signatures are beats-per-measure. Loopy does not consider the denominator of a time signature. (I.e. 7/8 and 7/4 are the same.)
Action: Assign, Toggle, Nudge, Save. Restore
Parameters:
Stop playback, reset the tempo and master length to an unset state. The next recorded loop will define the tempo and master length.
Assign the clock master length.
Parameters:
Turn on/off the metronome.
Parameters:
Modify the volume of the metronome.
Parameters:
Use this action to turn Ableton Link synchronization on or off.
Action: Toggle, Enable, Disable
Option: Set Tempo if Unset. When this option is on, turning Link on will set the project tempo to the current Ableton Link tempo.
Turn MIDI Clock Sync on or off to the targeted devices.
Target: the midi source or destinations targeted by the action.
Action: Toggle, Enable, Disable
Undo the last action.
Redo the last undo step
Begin a new project.
Parameters:
Load a project, with an optional cross-project transition.
Parameters:
Save the project.
Parameters:
Modify the main output volume.
Parameters:
Cancel scheduled actions that have not yet been performed. Use this action to cancel actions such as delayed actions that have been queued but not yet performed. In some cases (such as when there are series of actions that call other actions), you may need to call this action more than once to ensure that the actions are canceled.
Turn Sequence mode on or off.
Parameters:
Toggle, show or hide the mixer.
Toggle, Start or End a session recording using the current session recording settings.
Send some MIDI to a MIDI target.
Parameters:
14-bit MIDI: From continuous widgets (such as faders and knobs), you can send the widget value as a 14-bit CC message. 14-bit MIDI messages are sent as a pair of MIDI CC’s with CC numbers that are 32 (20 hexadecimal) apart. For example, B005XXB025XX will send the widget’s value as a pair of CC messages that will be interpreted as a 14-bit value if the receiver knows how to handle 14-bit MIDI.
Switch to, toggle, or enable/disable a particular control profile.
Parameters:
Follow Actions are actions or action sequences performed after certain project and clip events occur. The Follow Action names are the names of events that trigger actions, not actions themselves. For example, in the Follow Actions panel Load Project doesn’t load a project. The actions that you add to the Load Project section are performed when a project first loads. Similarly, the Stop Clip follow action does not stop a clip. The actions in the Stop Clip section are performed when a clip stops.
Adding actions. Where Follow Actions are listed, tap on the + to add actions for that trigger.
You might use follow actions to turn on an effect when a clips begins recording, and turn off the effect again upon record end. Or you might make one clip start another clip playing. You can even make chains of clips that start each other playing in turn, one after another.
You can define Follow Actions at the clip level (from a clip’s details panel), colour level (via the colour settings panel) or globally (project-wide) from the global Clip Settings panel.
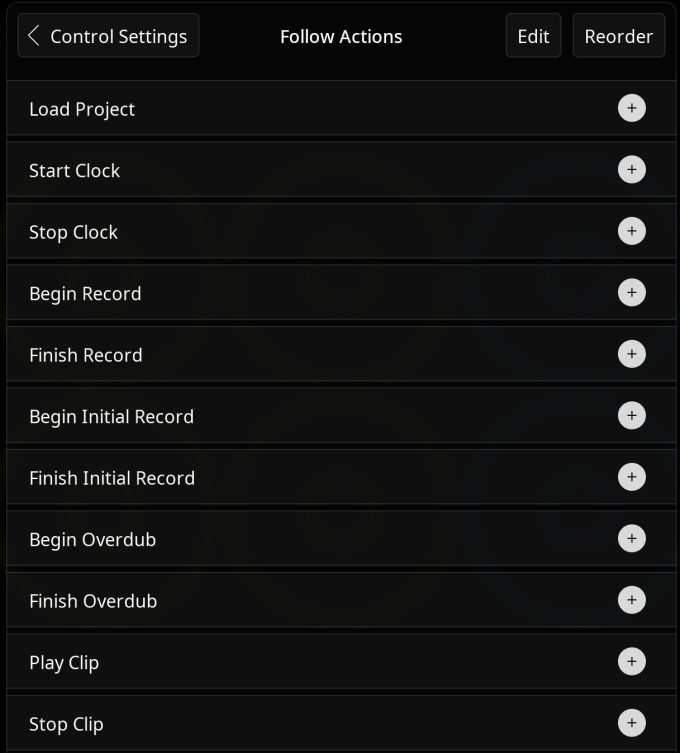

The following events are defined for Follow Actions:
Note that record, overdub and play follow actions are not mutually exclusive. A clip can be both playing and recording at the same time.
Play Clip and Stop Clip follow actions are triggered by the play/stop state of the clip changing whether or not the transport is running. Starting the transport does not trigger Play Clip follow actions of clips that are already play-enabled. When a loop is initially recorded, the play follow action is triggered when the recording ends and playback starts. If overdubbing happens while a clip is playing, it can be both playing and recording at the same time since overdubbing is also recording.
Begin Initial Record follow actions are triggered as soon as recording starts. Finish Initial Record, however, is called when the recording process has been finalized. Finalizing takes a small amount of time (usually a few milliseconds) after recording stops because a few things need to be calculated when the recording ends. As a result the Finish Initial Record follow action of a clip will happen after the Begin Initial Record follow action of another clip whose recording stopped the first clip’s recording.
Because Finish Initial Record (and and sometimes Finish Record) may execute just slightly after recording ends, you do not want to use it if you need to guarantee that the actions it initiates are completed before the new clock cycle starts. Sometimes, you will want to use the Begin Initial Recording to trigger delayed/quantized actions that will happen when the clip will stop recording.
See also: for more follow action details, see this tech note on the Loop Pro wiki
Loopy Pro provides a special Follow Action – Amplitude Envelope – which allows you to specify continuous value actions which map to the current clip volume as a clip plays.
You use this to implement sidechaining, where a parameter is controlled by an amplitude envelope. For example, you could configure an Amplitude Envelope on a colour representing your drum loops to drive the volume fader on a different colour for synth pads, for a sidechain compression effect.
Loopy Pro can be controlled via on-screen widgets, external MIDI controllers and typing keyboards (both USB and Bluetooth) via its flexible actions system.
Loopy Pro has built-in support for a number of popular controllers, including the Launchpad, the Akai APC40 mk2, and the MIDI Fighter Twister, and can be effortlessly set up to work with any other MIDI controller, via MIDI Learn.
Loopy Pro can be controlled by both MIDI Controllers and typing keyboards. The MIDI Learn system allows you to easily set up connections that we call bindings between controllers and Loopy Pro’s user interface, widgets and actions. Despite its name, MIDI Learn allows you to use typing keyboards (Bluetooth or USB) as well as any iOS-compatible MIDI device. There are two ways to configure how Loopy Pro responds to incoming controller events: via MIDI Learn itself or via Loopy Pro’s Control Settings screen.
MIDI Learn provides a simple, immediate way to attach an action to an on-screen element. Open MIDI Learn by either selecting “MIDI Learn” from the top-right menu, or by tapping the ![]() icon on the canvas editor.
icon on the canvas editor.
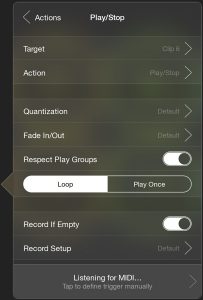
In MIDI Learn mode, hotspots are shown with a shaded background: tap one of these elements to open the MIDI Learn panel for that item.
The panel displays settings relevant to the given action, and may provide a list of alternative actions by tapping the top-left “Actions” button.
While the MIDI Learn panel is active, Loopy Pro is listening for incoming MIDI messages from any connected device (tap ![]() to connect any Bluetooth hardware you may have). Pressing a button or moving a knob on your MIDI controller will cause Loopy Pro to select that as the trigger for the shown action, thus creating a binding between the action and the incoming trigger.
to connect any Bluetooth hardware you may have). Pressing a button or moving a knob on your MIDI controller will cause Loopy Pro to select that as the trigger for the shown action, thus creating a binding between the action and the incoming trigger.
Typing keyboard note. Loopy Pro currently only supports press/on when using typing keyboards for bindings. Off, press/release, release and the like are not possible with typing keyboard bindings.
Widgets. When a project has multiple pages, MIDI Learn for widgets has an option for determining to which page the binding applies: This Page Only or Active Page.
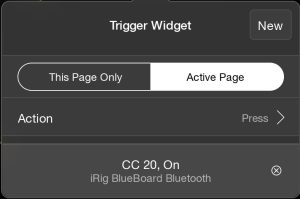
This Page Only means that the MIDI binding applies only to the particular item on this particular page. For example, if the first clip of the third page is the target, then the binding triggers the first clip of page three no matter what page is active. When the MIDI trigger comes in, the binding will trigger regardless of what page is active. This is useful for situations where you want to trigger an item even if its page is not visible.
Active Page means that the binding applies to the corresponding item of whatever page is visible when the binding is triggered. For example, if the binding is to the button on the page, it will apply to the first button of whatever page is visible at the time the binding is triggered. Note that if the order of objects differs on different pages, the target is determined by order/position not by the original target. For example, if Play All is the first button on page one and you learn that button for the active page, you are learning the first button on the active page. If Play All is the fifth button on page 2, the binding will trigger the first button not the Play All button. See this wiki page for more information about Active Page bindings.
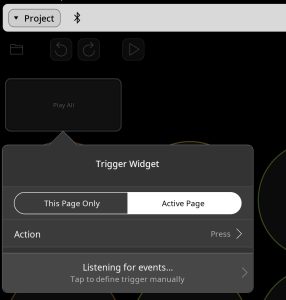
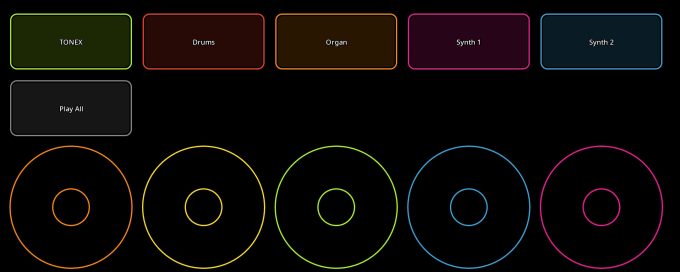
Clips. When targeting clips in multi-page projects, the mechanism is a little different than for widgets. By default, the clip targeted is the particular clip on the current page. When the binding is triggered, that clip will be targeted regardless of what page is active/current. To target a binding so that it triggers the clip on the page active when triggered, you need to use the clip target browser. To bring up the browser, tap on the target field then tap on Specific Clip(s). The clip browser has a view for each individual page (with the page’s name displayed) and has a last view labelled All Pages. Selecting a clip on All Pages is the equivalent of using the active page for widgets. If you pick a clip on the All Pages view, the binding targets that clip on the current active page when the binding is received. Make sure that you de-select the clip on the particular page before swiping through to All Pages.
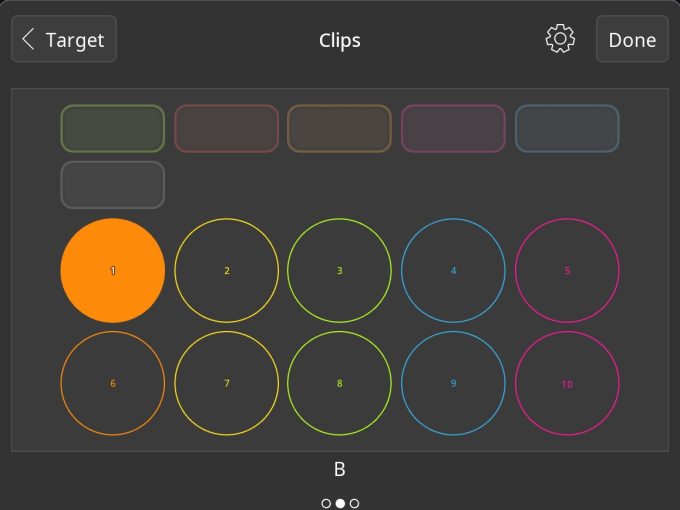
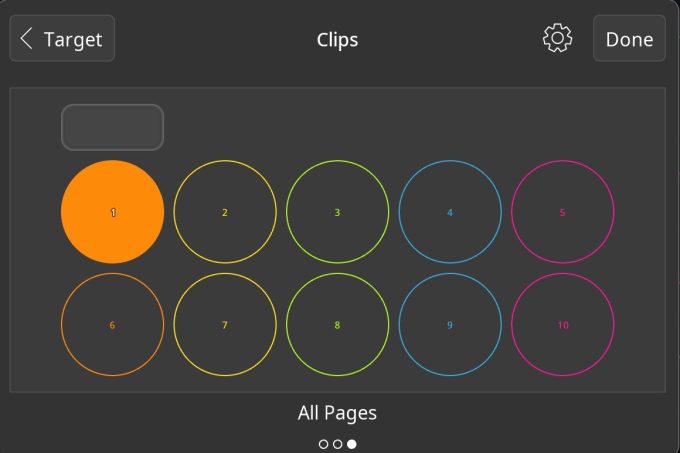
A trigger is an incoming MIDI message which can be bound to one or more actions. You can customise the trigger by tapping on the bottom trigger panel, shown with a shaded background.
For impulse action types (as opposed to continuous actions that you might map to a dial), you can configure Loopy Pro to respond to:
Hold and Double Tap MIDI triggers require that the controller be set up for fully momentary behavior: sending an ON message on press and an OFF message on release. Without both on and off messages, Loopy Pro is not able to detect hold and double tap. For note messages, ON is a velocity greater than 0 and OFF is velocity 0. For CC messages, ON is a value greater than 0 and OFF is a value of 0. ON messages are typically a CC value or note velocity of 127. PC (program change messages) cannot be used for hold and/or double-tap.
Special Considerations. When Hold and/or Double Tap are set up as MIDI triggers in addition to On, there are a few things to understand. Normally, ON bindings are triggered as soon as the ON message comes in order to eliminate latency. No-latency triggering requires immediate processing as there is no way to know when that ON comes in to know when you plan to release the controller or if a second ON is coming. As a result, if double-tap or hold are mapped to the same message, they will trigger the On binding immediately and then the hold or double tap binding as appropriate unless you turn on the option to defer processing.
Avoiding double triggers. When setting up a Hold or Double Tap binding, there is an option available to Defer Other Actions. Turn this option on if you want to avoid triggering the ON binding when hold or double tap are also defined. This will result in a slight delay when the ON binding is triggered. For some action combinations, there are ways to have have immediate ON processing without double-triggers. See this wiki article for information about that.
Note: when triggering widgets by touch, Loopy Pro automatically defers processing of the press gesture when Long-Press or Double-Tap are also used to avoid false triggering the press. This means that there is always a slight delay.
For continuous action types (such as a parameter adjustment), you can specify an incoming CC as Absolute or Relative; Loopy Pro may automatically detect this when you move the relevant controller knob. Absolute MIDI means that a controller sends values from 0 to 127 to represent the absolute position of the knob or fader. Relative MIDI means that a controller sends a message that indicates the direction the encoder knob is moving. For most continuous actions, you can also specify two ranges: A minimum and maximum value for the action (e.g. from -∞ dB to 0 dB), and a sub-range of the controller input. The former is used to limit the range of values of the parameter, while the latter can be used to allocate a sub-range of the available incoming values from the controller – to, for example, use the first half of a slider’s throw to adjust one parameter, and the second half of the throw to affect a different parameter.
Relative MIDI. Loopy Pro currently recognizes two relative MIDI conventions:
A binding is a mapping between an incoming MIDI event or keyboard trigger and one or more actions that are performed when that trigger is received. Bindings are created when you MIDI Learn or manually create a binding in Control Settings.
Hotspots with bound actions in MIDI Learn are shown with a lighter shaded background. You can also view a complete list of bindings in the Control Settings screen, accessible from the main top-right menu in Loopy Pro.
See Control Settings for more details on editing bindings.
Loopy Pro control profiles store the MIDI and keyboard mappings we call bindings. Projects can contain one or more profiles. It can be useful to have multiple profiles for organizational purposes or to be able to change the actions associated with MIDI bindings. For instance, your project might switch between “play mode” and “record mode” by changing the active profile.
Choose Control Settings from Loopy Pro’s main menu to access the profiles. Tap on a profile’s name to see the bindings it contains.
There are two kinds of profiles:
Project profiles allow you to store bindings that are saved within a project. You can reference specific project objects like clips and widgets, and references are persistent.
Global profiles exist outside of your projects, and are always available regardless of which project is loaded. You can have multiple global profiles and switch between them, either manually or via an action. Specific clips and widgets referenced from actions within a global profile are identified by their order on-screen, so rearranging your project canvas may result in the targets of some actions changing.
By default, for most connected MIDI controllers, Loopy Pro will send MIDI feedback for any currently-bound actions. For feedback, Loopy Pro sends the same MIDI message on the same MIDI channel used by the binding.
For example, if you have CC 20 on Channel 1 bound to a clip’s Play/Pause state, whenever that state changes Loopy Pro will send CC 20 on channel 1 back to the MIDI controller with a value corresponding to the current clip state. Similarly, if you have a CC set to control an AUv3 effect parameter whenever that parameter changes, Loopy Pro will send that CC back to the MIDI controller with the corresponding value.
This allows compatible hardware to display the current state of Loopy Pro.
If this is not desired, this can be disabled by opening up Control Settings, tapping the device name, and turning off the switch beside “Feedback Enabled”.
The MIDI feedback scheme used by Loopy Pro is the most common one used by controllers, but not all controllers respond to it. Some controllers don’t respond to MIDI feedback at all. Some controllers use a different feedback convention and expect feedback on a different MIDI Channel. Some controllers will echo back any MIDI they receive which results in a MIDI feedback loop.
Loopy Pro supports any controller capable of communicating via MIDI. However, there is enhanced support for certain controllers, to implement special features like RGB lighting.
This list is growing – see the Loopy Pro roadmap for details, or to request support for your hardware.
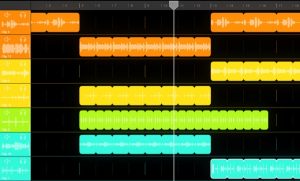 Loopy Pro’s Sequencer allows you to sequence each clip in your session, either by entering sequences by hand, or recording them using the sequence recorder. These sequences can be played back, or exported to a multi-track or stereo audio file.
You can automate a live-looping session by sequencing your clips, and using the sequencer to trigger record and playback.
You can switch between sequencer/timeline playback and regular live looping with the Toggle Sequence action, and you can use MIDI Bindings and widgets to navigate the timeline with the Seek Timeline action.
Open the Sequencer by tapping the ![]() button in the bottom-left navigation area.
button in the bottom-left navigation area.
Each row in the Sequencer represents an individual clip on the main canvas of Loopy Pro. You can reorder these rows by tapping and holding in the left area, and dragging up or down.
Zoom in or out by pinching in the main area to expand or contract the number of bars visible. Pinch to zoom vertically to grow or shrink each row. In version 1.x, vertical zooming needs to be done by pinching in the left column.
When a sequence exists, a new SEQ button appears on the top toolbar. Tap this to enable or disable the sequence.
Create segments on the sequencer by tapping in the main area. Press and hold a segment from the middle then drag left or right to move it in the timeline. Drag from the end to expand the segment along the timeline, and drag from the start to contract it forwards. Tap a segment to select it, and to copy or delete it.
Segments will snap to the grid determined by the current zoom level. Zoom in – by pinching with two fingers in the main area – to zoom in and decrease the grid snap size. When zoomed all the way in, no snap-to-grid is applied.
Tap ![]() in the bottom right of the screen to toggle selection mode; when active, you can tap and drag over segments to select them as a group.
in the bottom right of the screen to toggle selection mode; when active, you can tap and drag over segments to select them as a group.
You can also record sequences as you perform in Loopy Pro. Tap the ![]() button on the top toolbar to open the Session Recording pop-up, then tap “Record Sequence”, to enable sequence recording.
button on the top toolbar to open the Session Recording pop-up, then tap “Record Sequence”, to enable sequence recording.
Tap “Start Recording” to begin; Loopy Pro will count in for 4 beats, then begin recording. Any clips that are recorded, or played or muted, will be recorded to the sequencer timeline as segments.
Tap ![]() again to stop recording.
again to stop recording.
You can use Loopy Pro’s sequencer to automate full performances, with recording actions and play/mute driven by the sequence.
When you have created a sequence, you can clear the audio out of sequenced clips – either via a swipe gesture on the clips on the main screen, or by double-tapping the waveform in the row header in the sequencer, and tapping “Clear” or “Clear All” – then an “Arm” option will be displayed in the row header.
Tap “Arm” to open the Arm Recording settings pop-up.
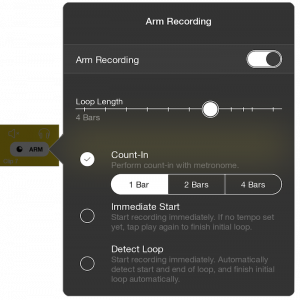
Turn on the switch beside “Arm Recording” to arm the clip. When the playhead reaches the first segment within the timeline, the clip will begin recording, for the length defined by the “Loop Length” slider.
If the segment is positioned at the very beginning of the timeline, additional options are presented, to determine how the session will begin.
You can create looping regions on the sequencer timeline by tapping the ![]() icon at the bottom right, or by tapping the timeline marker and tapping “Loop From Here”. Drag the start and ends of the loop marker in the timeline header to adjust the start and end, or drag from the middle to move the loop region backwards and forwards in time.
icon at the bottom right, or by tapping the timeline marker and tapping “Loop From Here”. Drag the start and ends of the loop marker in the timeline header to adjust the start and end, or drag from the middle to move the loop region backwards and forwards in time.
During playback, when the playhead enters the loop region, Loopy Pro will loop through the defined region continually, until you tap the play/pause button which shows the ![]() symbol (or activate the controller bound to the Clock Pause action), whereupon playback will continue past the loop region when it is next reached.
symbol (or activate the controller bound to the Clock Pause action), whereupon playback will continue past the loop region when it is next reached.
You can use timeline looping in combination with sequence recording, to progressively record a sequence over several cycles. Timeline loops are also useful for marking a freeform part of a performance which may be of indeterminate length.
Tap the loop region in the timeline header to disable or delete the loop region, or tap ![]() to toggle between enabled or disabled state.
to toggle between enabled or disabled state.
You can export your sequence as a stereo mix with all effects rendered or as stems. To export from the sequencer, tap on the share icon that appears at the right side of the lower tool. If the mixer is visible, close it in order to make the lower toolbar visible.
The export options are:
When clips are recorded in the sequencer, they receive a set length. A clip will also receive a set length if the clip is cleared while an event for it is in the sequencer even if the clip was not originally recorded in the sequencer.
Removing a pre-set length. If a clip has a fixed length as the result of being in the sequencer and you want to unset the length:
Loopy Pro projects are flexible, customizable environments where you can combine and control multiple audio clips, effects, and inputs. They are central to how you organize your music and live performances. Projects are file bundles that contain the layout, audio and MIDI bindings.
Loopy Pro creates new projects in the Loopy Pro folder on your device. You can move projects to other folders and accessible media using the iOS File browser. Loopy Pro can run and save projects that are outside the Loopy Pro folder, but you must open them from outside of Loopy Pro as its browser is restricted to what is found in the Loopy Pro folder.
Because you often want to make temporary changes to a project, Loopy Pro does not auto-save the project. To make changes to your project permanent, you save the project.
Loopy Pro features an auto-save-like function that allows you to leave and return to a project, preserving its exact state. While you’re working, the app continuously saves your progress within its Workspace project. When you create or open a new project, the Workspace is cleared. Before switching projects, Loopy Pro will prompt you to either save or discard your changes, ensuring your work is protected before the Workspace is reset.
The folder icon in the upper-left toolbar provides access to the project manager and a list of recently opened projects.
Press and hold the folder icon to pop down a list of recently opened projects. You can also save your project or create a new one from the list.
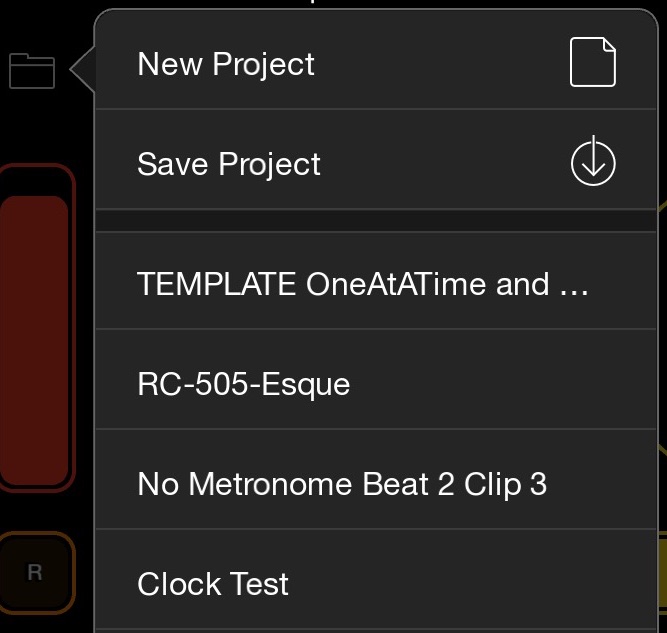
Tap the folder icon to pop up the project save panel.
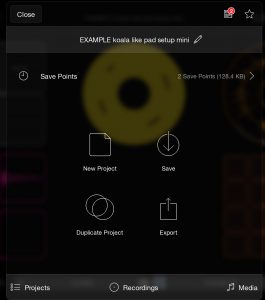
Features:
In the save panel, tap Projects, Recordings or Media to switch to the browser appropriate to the selected item. The browser lets you find, reorganize, and rename files and folders. Mostly, you see the same files and folders that you would see in the iOS Files app but there are some additional features.
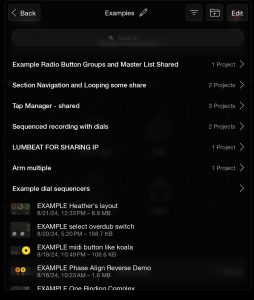
Tap the Edit button to move or reorganize the files and folders.
There are a few items that do not correspond to items you can see in Files.
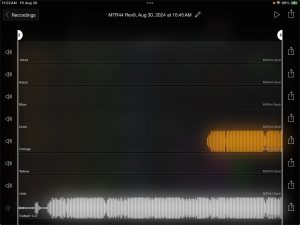
The recordings browser lists session recordings. Press the play button to preview the session recording or long-press to see and hear the session’s individual files.
Tapping the project manager’s Export button gives you the option to export the project or the project’s audio files. The standard iOS Share Sheet is presented for picking the destination. When exporting a project, save points are not exported. Use the iOS Files app to move or copy projects if you want to preserve the save points. Exporting audio files, exports the audio from all loops and one-shots. To export a mix from the sequencer, go to the Sequencer view and tap its share icon.
To export the audio from selected clips and one-shots, enter Loopy Pro’s layout edit mode, drag a selection rectangle around the desired clips, and then choose “Export” from the popup menu that appears.
To export the audio from an individual clip, show the clip details and tap on the Export (share) icon.
When “Use Save Points” is enabled in the System Settings panel, Loopy Pro automatically creates a recallable snapshot of your project as a Save Point. Restoring a Save Point brings the project back to the exact state it was in at the time of saving. Since Save Points include all project audio, they can increase the file size. Save Points are especially useful when making changes you might want to undo later. You can delete unnecessary Save Points as needed.
To access Save Points, open the project save panel and tap “Save Points.” This will bring up the Save Point browser, where you can restore or delete Save Points.
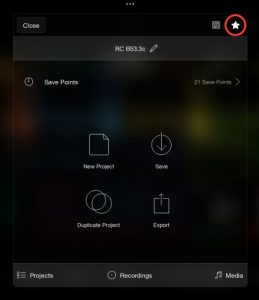 Templates are projects that serve as starting points for new projects. A project is made a template by tapping the project save panel’s star icon. When a new project is made from a template, a copy of the template is opened.
When there is only one template, new projects are automatically made with the template. If there is more than one template, you are presented with a list of available templates when you create a new project.
Using Loopy’s default template instead of your own. If you want to use Loopy Pro’s default project instead of your template, long-press New Project in the project browser. It will let you choose the built-in Default factory project template.
When a new project is started from a template, a copy of the original project is made and given a new name.
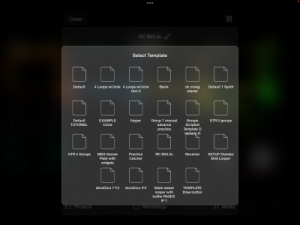
TIP! When saving a project to be used as a template, delete any unnecessary audio clips.
Use Set Lists to chain projects together in performance with seamless transitions. Switching projects is accomplished via the Load Project action. Use the action in an on-screen button, a MIDI binding, or a follow action to chain projects together.
You create and manage Set Lists from the Project browser. In the project browser, tap on Projects tab then tap Set Lists towards the top of the project browser to access and create set lists. Tap “Create Set List” to create a new set list; use “Add Project” to add projects to a set list. Drag the handles at the left to change the order.
Session recording has two different ways of capturing a performance: audio or sequence recording. Audio session recording captures the performance as audio files. A sequence recording captures the performance as events in the sequencer.
Audio session recording can capture everything that passes through Loopy Pro’s mixer including solos and other audio not contained in loops or one-shots. Sequencer recording creates a sequence of audio recorded or played into clips but doesn’t capture audio that you don’t record into clips.
To record and audio session, tap on the REC button and tap on Configuration to select what gets recorded. Tap Start Recording to start recording. Tap the REC button again to end the recording.
The session’s audio is captured to files in a uniquely named folder that ends “.lprecording”. Each session is recorded in its own folder. Loopy’s project window let’s you listen to a preview mix of session recordings. The actual files are accessible via Files app. They are found in the Loopy Pro folder.
Lossless Recording On/Off: By default, Loopy Pro saves session recordings as compressed (AAC/mp4) audio files. Turn Lossless Recording on to record uncompressed audio.
Capture options:
Audio from loops and one-shots recorded during the session is included in the relevant output file, but the individual clips are not saved as individual files. A project’s clips can be exported by separately if desired.
A session recording will often include several files. You can preview and browse session recordings and their files in the Project Manager’s recordings browser.
Use this to capture clip-based performances. The performance is recorded as events on the sequencer timeline.
The Loopy Pro AUv3 can be loaded as an audio instrument, music effect (an audio effect that can receive MIDI input) or a MIDI processor. As an AUv3, Loopy Pro can be run as a multi-bus audio unit with multiple inputs (when run as an effect) and outputs. It can run as a MIDI processor for those times where you want to use Loopy Pro just as a MIDI controller.
The Loopy Pro AU project browser sees other Loopy Pro AU projects. Due to a quirk of how iOS handles AUv3 file storage, these files aren’t visible in normal file browsers. The standalone app’s project browser provides access to the AUv3’s projects. These appear in a folder called Audio Unit Extension folder (which is only visible to Loopy Pro). You can move projects into and out of the Audio Unit Extension folder using the Loopy Pro project browser.
i(Pad)OS does not allow Audio Units to load other audio units. When moving standalone projects into the audio unit extension folder, you should remove any Audio Unit instruments and effects from the project.
In the Loopy Pro AU, System Settings panel, there is a State Saving option. The Whole Project option will save all of the project’s data (including its audio) as part of the AU’s state. Project Reference Only saves only a reference to the project file found in the Audio Unit Extension folder. This option uses less memory and storage than the Whole Project option, but you must remember to save the project itself when you make changes that you want to keep.
You can expose the elements of AU projects to the host as AUv3 parameters so that they can be manipulated with whatever tools the host provides for accessing AUv3 parameters. These will appear to the host as Parameter 1 through Parameter 128. To expose elements of your project as AU parameters, choose Exposed AU Parameters in the Control Settings panel.
The Loopy Pro AUv3 can be used as a multi-input/multi-output instrument or effect in hosts that support multi-in/out AUv3. Load it as an effect if you need to record external inputs. Load it as an instrument if you do not need to record from other sources.
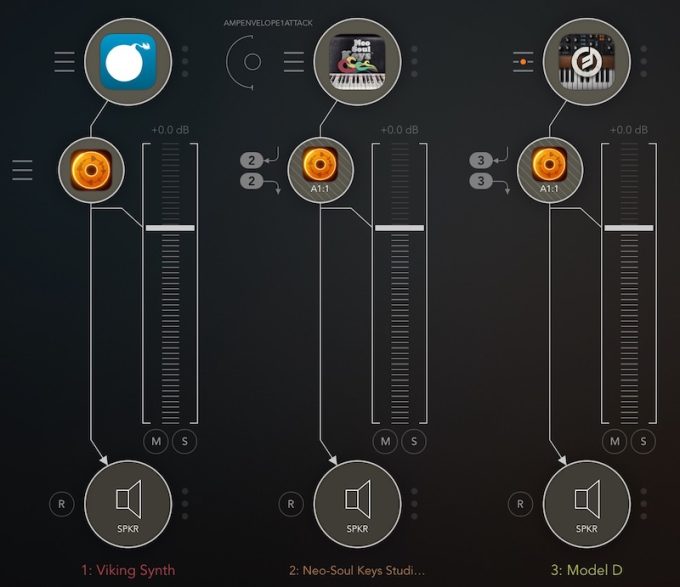
By default, the Loopy Pro AU has one stereo input and one stereo output. For multi-in/out operation, add additional inputs and outputs to Loopy Pro’s mixer. To do this:
The Clip Settings panel has links to Playback settings, Recording Settings, Gestures and Follow Actions. These are global settings that apply to all of a project’s clips – these can then be overridden at the colour, clip, and action level.
Clips have a large number of recording and playback settings that can be used achieve a wide range of workflows. As mentioned in the Configuration overview, there is a settings hierarchy that allows colours and individual clips to have settings different from the project-wide settings.
For each setting, the project-wide setting is used unless it is overridden at the colour or clip level. Colours inherit their settings from the project-wide settings. Clips inherit the settings from their colour.
Colours and clips can override their inherited settings. An override setting becomes independent of the inherited setting. If you set a clip’s threshold recording setting, for example, it will be immune to later changes of that setting made at the project-wide or colour level.
Use the colour or clip settings panels to edit the overrides. When you look at a colour’s or a clip’s settings panel, any overrides that have been set up will be displayed. Tap the Edit Overrides button to edit the overrides for that section’s settings.
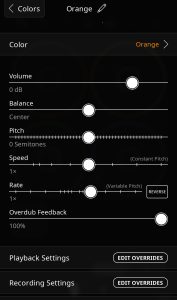
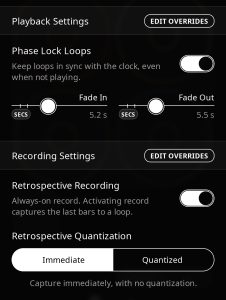
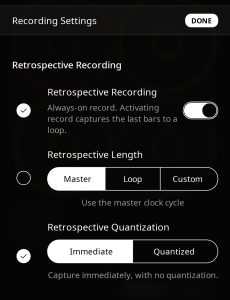
When you are editing overrides, a checkmark indicates that override is turned on for that setting. When an override is turned on, changes made at higher levels will not affect this setting.
Why does Loopy Pro show an override turned on even though it has the same setting as the inherited setting? Any time you turn on an override, it becomes independent of the inherited setting no matter what the setting is. You might turn on an override for the Threshold Recording setting, for instance, because you want to control that clip’s Threshold recording no matter what the global setting is.
To remove an override, tap Edit Overrides, find the overrides setting and remove the checkmark next to the setting. Then, tap DONE.
As of Loopy Pro 2.0.6, overrides need to be removed manually in the settings panels. There is not an action to remove overrides though you may use the Assign Clip Settings action to change the setting used by an override.
The following settings define how clips play and stop. These can be overridden for particular colours and individual clips, as well as for individual playback actions.
Configure the synchronisation intervals at which loop play and stop events occur:
Default value: Loop
Configure the synchronisation intervals at which one-shot playback begins. None: Play one-shots immediately. Master: Synchronise one shots with the clock master cycle. Custom: Define a custom sync interval. Default value: None
When you activate an action a second time during a quantisation count-in or out, then if this setting is enabled Loopy Pro will begin a second-level 1-bar quantisation interval. If this setting is off, then the quantisation will just be cancelled, and the action performed immediately. During the second-level count-in, the action can be activated again to cancel this second count-in, and perform the action immediately. Default value: Off
Keep loop playheads synced with the timeline/clock even when not playing. A phase-locked loop has a playhead that runs in sync with the master clock regardless of whether the loop is playing or not. Playing a phase-locked loop engages the playhead so that the audio is audible. Stopping a phase-locked loop disengages the playhead so that it is not heard even though the playhead keeps moving. If you want loops to start from the beginning when they start playing, turn off phase-lock. Non-phase-locked loops are called Free loops. Free loops only have a playhead while actively playing
If you turn off Phase Lock, then Play/Stop Quantization determines how loops will be synchronised with each other, as this dictates the start synchronisation. Default value: On
NOTE: Some actions (such as speed and rate changes) will turn phase-lock off. The Phase Align Clip action can be used to realign the clip with the master clock and turn phase-lock back on.
Determine whether and how clips are fit to the project’s tempo.
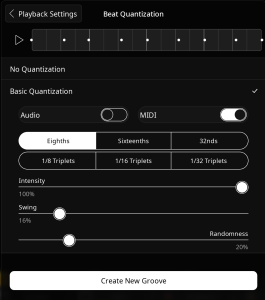
Non-destructive playback quantization for MIDI and audio clips.
Beat Quantization can be applied to MIDI and/or audio clips, it is primarily intended for MIDI playback quantization. In general, we recommend using Beat Quantization for MIDI rather than recording quantization. Note: Audio beat quantization is an in-process experimental feature that will work better with some sources than others.
Beat/Grid Display
The display at the top of the Beat Quantization display shows the grid points to which notes are pulled when quantized. The lines are a sixteenth-note grid. The white dots are the grid points to which notes are quantized. The display is dynamically updated as the settings are changed.
The grid’s play button plays clicks at the grid points to sonify the quantization grid.
Quantization Types
The amount of audio to blend across loop boundaries. When recording loops, Loopy Pro will begin recording a little early, and end recording a little late, and use this additional audio to blend smoothly across the loop boundary. Set this to longer values to create a very smooth, long fade (good for drones, for instance), or shorter values to create a shorter transition. Default value: 50ms
The interval over which to fade in and out clip playback, rather than starting and stopping immediately. Set it to any duration, or:
Whether to only play one-shots while holding. When this setting is on, releasing a one-shot will stop playback. Default value: On
Whether to begin recording empty clips when triggered. If you disable this setting, tapping a clip or triggering it via an action/MIDI will have no effect. With this setting on, tapping an empty clip will begin recording. Default value: On
If you stop all loops playing in a session, the clock will be paused until you start a loop playing again. Note that when a session is first opened, toggling a clip from stopped to play-enabled does not start the clock. Toggling a clip from being stopped to play-enabled unpauses the clock only if the clock has run at least once in the current session; this allows you to get clips into the desired Play/Stop state before starting initial playback. If you want play-enabling to always start the clock, use the Play/Stop clip action and turn on the the option Start Clock if Paused.
Default value: Off
The following settings define how clips record. These can be overridden for particular colours and individual clips, and can be customised for individual record actions.
When this setting is on, Loopy Pro is continually recording into a buffer, set by the current clock master cycle length. When you trigger recording, this buffer is instantly copied to the triggered clip, allowing you to capture a loop after the fact. The audio that will be recorded depends on the Retrospective Quantization setting. Default value: Off
The quantisation interval to use when triggering Retrospective Recording. Immediate: Capture the immediately-preceding audio, regardless of position in the current cycle. Quantized: Capture the last cycle, aligned with the clock master cycle. If recording is triggered shortly before the start of a cycle boundary, Loopy Pro will capture the current cycle, continuing recording the live audio until the cycle is complete. Default value: Quantized
The synchronisation interval for beginning loop recordings.
The synchronisation interval for ending loop recordings.
When this setting is enabled, loops will record for the Count Out Quantization interval, and then stop recording automatically. This allows you to record loops of a pre-defined length without needing to manually end recording. If you disable this setting, clips will continue recording indefinitely, until you stop recording, and Loopy Pro will select an appropriate quantised length for the clip, if Length Quantization is enabled. See Pre-Set or Free Loops for further discussion. Default value: On
Customize these settings to use different count-in/count-out settings for overdubbing and initial recording.
Whether to constrain loop lengths to multiples or subdivisions of a bar. Default value: On
When recording a new loop and ending record before the set quantisation interval, whether to extend the loop with silence to the full interval. Default value: Off.
Whether to rotate new loops so that the start point is aligned with the current musical phase. The musical phase is determined by the longest playing loop.
If you disable this setting, Loopy Pro will perform no adjustment, so the start of the loop will be the point at which you began recording, which may not be what you expect. Default value: On
Example: Say you have a 2-bar drum loop and 12-bar rhythm guitar and bass tracks playing. If you start recording a new clip 4 bars into the cycle and record for a full cycle, your new clip will be rotated so that when you play it from the beginning where you started recording will be 4 bars into the clip which lines up with the other clips. If phase preservation were turned off, your clip would start where you started recording and would not line up with the loops that were playing when you recorded.
When on, audio loops will wait for the input level to cross the defined audio threshold before recording starts. For MIDI loops, recording starts when the first MIDI note message arrives.
You can use this facility to “arm” a loop in advance, which will only start recording when you begin playing. Default value: Off
When on, one-shots will wait for the input level to cross the defined audio threshold before recording starts. For MIDI one-shots, any note on message triggers the threshold. Default value: On
The level meter labeled Audio Threshold sets the audio level that triggers recording when threshold recording is turned on. This applies to audio loops and one-shots. This is a global setting that applies to all audio threshold recording.
When enabled, Loopy Pro will begin listening immediately upon starting a record count-in. If the audio level crosses the threshold, recording will begin immediately, and the audio will be recorded to a special “intro” section of the loop, which will play back when starting the loop playing. This setting requires Count In Quantization to be enabled. See Intro and Tail for further discussion. Default value: Off
When enabled, Loopy Pro will continue recording for a short time after loop recording ends. Recording will continue until Loopy Pro detects that the audio level has dropped off. The audio will be recorded to a special “tail” section of the loop, which will play back in the second and latter repeats of a loop, and when the loop is stopped. See Intro and Tail for further discussion. Default value: Off
MIDI recording quantization is destructive quantization applied to recorded MIDI. The options are the same as for beat (playback) quantization. It is often preferable to use playback rather than recording quantization
This setting determines how non-note MIDI data is treated when overdubbing. This helps avoid conflicts between existing automation events and new ones.
When enabled, you can record multiple loops at the same time. If disabled, when you start additional loops recording while a loop is already being recorded, the additional loops will enter a record queue, and each loop will be recorded one after another. Default value: Off
Configure how a loop behaves after its initial recording has completed. Play: Loop will begin playback immediately after recording. Stop: Loop will be silent after recording. Overdub: Initially begin overdubbing, for recording additional layers. Default value: Play
With this setting enabled, when the clock is paused and you start a loop recording, Loopy Pro will not begin recording until you unpause the clock. If this setting is disabled, Loopy Pro will automatically unpause the clock and begin playing when you start recording. Default value: Off
When enabled, Loopy Pro will automatically detect and trim the first loop of a session, allowing you to create tight, well-timed loops without having to be precise with the record start and end timing. See Automatic Loop Detection for more discussion. Default value: Off
With this setting enabled, Loopy Pro can automatically detect a loop of the given length, end recording and begin playback, allowing you to record the first loop of a session entirely hands-free. You must first set either the master cycle length or a clip’s pre-set length, and it’s recommended that you also set a rough tempo to assist accurate detection. Default value: Off
Set up Follow Actions here, in conjunction with Loopy Pro’s powerful actions system to perform actions when certain events occur, like clip playback, recording, or upon project load.
The Color Groups screen allows you to add, remove, and configure colours in Loopy Pro.
Here, you can provide a name for colours – which appear as tracks in the Mixer, as well as elsewhere – and set the volume, balance, pitch and playback speed of clips within each colour.
You can specify custom playback and recording settings per colour.
This area of Loopy Pro is where you can customise the behaviour of your controllers, as an alternative to MIDI Learn.
Here, you can enable Loopy Pro’s OSC server, allowing you to control Loopy Pro from other OSC-compatible software and devices.
Use the OSC Actions Directory to look up OSC addresses for actions, and enable feedback for individual addresses (requires a TCP OSC connection).
When using OSC, you can use the provided OSC addresses as listed in the directory, or you can use your own addresses and make bindings within Loopy Pro using the (uh, increasingly inaccurately-named) MIDI Learn feature.
If you wish to connect to Loopy Pro via MIDI over network, enable this here. This is disabled by default in Loopy Pro 1.1 and onwards due to an ongoing iOS MIDI bug, where network MIDI interferes with MIDI connections.
All MIDI devices connected to Loopy Pro appear in this section. Tap to configure the device.
Edit the control profiles for your currently-loaded project here.
Project profilesallow you to store bindings that are saved within a project. You can reference specific project objects like clips and widgets, and references are persistent.
You can also edit the global Follow Actions here.
See Editing Bindings below for further discussion.
Edit global profiles here.
Global profiles exist outside of your projects, and are always available regardless of which project is loaded. You can have multiple global profiles and switch between them, either manually or via an action. Specific clips and widgets referenced from actions within a global profile are identified by their order on-screen, so rearranging your project canvas may result in the targets of some actions changing.
See Editing Bindings below for further discussion.
There are two primary ways to edit bindings in Loopy Pro: Here, in Control Settings, or via MIDI Learn.
MIDI Learn provides a fast, simple interface, allowing single actions to be bound quickly.
In Control Settings, you have more control over creating custom bindings, with the ability to chain multiple actions together in custom sequences, with support for doing something different with successive button presses, or performing a timed sequence of actions, or combinations of both.
Tap a control profile, either in Current Project or Global Profiles, to open the profile editor. Here, the bindings that are saved to the profile are shown, along with controls to rename the profile, duplicate it, or export it.
Tap “Add New Binding” to create a new binding. You will be presented with a directory of possible actions to perform. Select one, and configure it, then tap “Save” to store the action to your new binding. Loopy Pro will then listen for incoming MIDI/OSC messages – when it receives one, it will bind the action to this message. You can also manually select the trigger by tapping in the “Trigger” field.
You can add multiple actions by tapping “Add Action” – for example, you can have a dial adjust multiple parameters simultaneously, perhaps changing different parameters at different sections of the control’s value range. Or, you can have a button push perform multiple different things, such as enabling an audio source before beginning a loop recording.
The Synchronization menu gives you access to all the settings for synchronizing Loopy Pro with other applications and devices. Loopy Pro can use both Ableton Link and MIDI Clock and can be used to bridge Ableton Link and apps or hardware that use MIDI Clock.
Options:
Ableton Link is designed for cooperative behavior unlike MIDI Clock. With normal Ableton Link behavior, no app or device is the master. It operates entirely cooperatively. Link maintains the clock not an individual client. Any client can change the tempo or start/stop the clock. Link shares precise tempo information, beat information and bar boundaries.
With Link, any client can change the tempo and the other clients change also. Normally, when a client starts, it starts at the beginning of Link’s next clock cycle. This makes it easy for all clients to start and stop on bar boundaries. When you press play, there is usually a short wait until Link reaches the next bar boundary.
With MIDI Clock, one app or device is the clock master. All the clients follow the clock sent by the master. MIDI Clock does not have precise tempo or bar boundaries. It is just a a series of pulses. Each clock client calculates the tempo from the received pulses. There is no notion of bar boundaries, so you need to take care to start your apps and hardware at the beginning of a measure to keep their measures aligned.
Loopy Pro’s Act as Master option allows Loopy Pro to act somewhat like a MIDI clock master for situations where you want Loopy Pro to start immediately and need Loopy Pro to always control the tempo. When this mode is on, any link clients set to start/stop automatically are likely to start one measure after Loopy does since they need wait for the beginning of the Ableton Link clock’s next cycle.
When this option is on, Loopy Pro is not behaving like a normal Ableton Link client and may have surprising impact if you aren’t aware of how Ableton Link normally works.
Loopy Pro can send and receive MIDI Clock. When sending MIDI Clock, it also sends MIDI SPP (Song Position Pointer) messages so that clock clients can keep their songs and sequences aligned with Loopy Pro’s timeline.
Loopy Pro sends MIDI Clock Start messages when you press the transport play button. If you are recording a first loop that sets the tempo, Loopy Pro sends a MIDI Clock Continue message and a MIDI Song Position Pointer message that indicates the length of the first loop.
If you want Loopy Pro to follow another app or device’s MIDI Clock, choose it from this list. Be aware that when an audio application like Loopy Pro follows MIDI Clock, it must constantly adjust the audio (time-stretching) to keep it synchronized. This can impact audio quality and increases CPU usage. Generally, you want Loopy Pro to be the MIDI Clock source rather than a client.
Options:
Select any apps or devices here to which you want Loopy Pro to send MIDI Clock. An offset slider, let’s you offset the clock to achieve the tightest possible synchronization.
The Clock Settings panel gives you access to useful options related to Loopy Pro’s clock and transport. This panel is also displayed when you press the clock panel’s gear wheel icon. See The Clock for details.
Choose System Settings from the main menu to access the System Settings panel.
When this option is on, Loopy Pro is fully-operation when it is in the background. When it is off, Loopy Pro stops processing audio when it is not the foreground app. When Play in Background is off, Loopy Pro needs to re-activate plugins when it comes back to the foreground which can take time.
When orientation lock is on, rotating your iPad or iPhone will not change the orientation of the current layout in this sense: whatever is in the upper-left will remain in the upper-left after rotation; whatever was in the lower-right will remain in the lower right.
Choose from available sample rates. Generally, changing the sample rate changes the sample rate of the attached audio interface if there is one. Some interfaces do not respond to host requests to set the sample rate.
This setting sets the OS’s audio buffer length. The audio system has a buffer that collects audio to be processed. The larger the buffer is, the greater the latency. The smaller the buffer is, the higher the computational demand. Small buffers can make it hard for the device to keep up with the processing demand which can lead to audio crackling.
The choices are uncompressed 16, 24 or 32-bit files or AAC compressed files.
Turn this option on to use Save Points which are recallable project snapshots created when you choose Save Project. See Save Points.
When this option is on, disconnecting your audio interface automatically mutes audio sources that might cause feedback.
When this is on, a Network MIDI Session is made active. This option is off by default as we have found that when Network MIDI is on, it can reduce stability and can interfere with MIDI operation. When you turn it on, Loopy Pro will ask you to re-consider.
Multiroute Audio is an OS feature originally intended to allow you to use the wired headphones while also using an audio interface for output. Its behavior is somewhat unpredictable and out of the audio host’s control. Bluetooth audio devices and AirPlay are not supported in this mode.
Some people report that they can send output to multiple attached audio devices when Multiroute is on, but we have found it somewhat unpredictable and generally recommend that it be left off.
We have sometimes found that turning it on and then off can fix audio connectivity problems.
When this option is on, Loopy Pro will show text indicating the color of the project’s clips.
Loopy Pro uses your preferred language for its menus and text. It defaults to the language used by your device. If you prefer to use English, you can change that in the Loopy Pro settings in the iOS Settings app:
Loopy Pro stores your non-AU projects, global profiles and effects preset settings in the Loopy Pro folder found in the Files app On My iPad or On My iPhone. Make a copy of that folder to your preferred location to back up your non-Audio Unit Loopy Pro data.
If you use Loopy Pro as an audio unit, the saved projects are in a pseudo-folder that you see as Audio Unit Extension Folder in Loopy Pro’s project browser. Unfortunately, due to a quirk of iOS, that folder is not actually in the Loopy Pro folder or visible in the Files app. To back up your audio unit projects, use one of the following methods:
The desktop backup program iMazing is a useful tool for backing up iPads and iPhones as it allows incremental retrieval of backed up application data unlike iOS’ native backup/restore procedure that requires a full restore of the entire device.
Need some more help?
The Loopy Pro Wiki is a growing source of information about Loopy Pro.
Loopy Pro has a number of active communities full of experienced users that are happy to help. The communities are a good source of information and insight into how people use Loopy Pro and what equipment they use it with.
Prefer to talk to us directly? You can also email us at [email protected]
This is a quirk of Measurement Mode, a feature that Loopy Pro’s echo cancellation requires. If you turn off echo cancellation, Loopy Pro will also turn off Measurement Mode, allowing access to your Bluetooth hardware. Open the mixer, tap the microphone icon at the top of the hardware input channel strip, then turn off the switch beside “Echo Cancellation”.
Another Measurement Mode quirk, I’m afraid. See immediately above for instructions to disable echo cancellation. Note: you will lose the benefits of echo cancellation, so it’s important that if you plan to record from the mic that you use headphones, or external audio gear.
Currently, only note data can be edited in the piano roll editor. We will be adding automation editing in the future.
Yes, it can
The Loopy Pro Wiki is a good source for information and includes answers to many other frequently asked questions.
If you are having trouble, see the Troubleshooting page of the Loopy Pro wiki.
If Loopy Pro or another third-party app is crashing, and dumping you back to the home screen, it can be very helpful to see the associated crash log so that I or the developer of the third-party app can fix the issue. While we may get anonymised versions of these in a big lump, it can be difficult to tie certain events to individual crashes, which can sometimes be necessary for nailing a bug.
If you’re up for it, finding and sending me a crash log can go a long way towards solving the crash. Here’s how to find and send them in:
If Loopy Pro actually crashed on load, Loopy will move the current workspace away and then open a blank project. It may help diagnose the issue if you send me the crashed workspace: you can find this by opening up the Files app on your device, the navigating to “On My iPad” (or “On My iPhone”), then finding “Loopy Pro”. Long-press on the “Workspace (Crashed)” file within the Loopy Pro folder (or “Workspace”, if it hasn’t been moved away yet), then tap “Compress” to make it into a zip file. Then long-press on the newly-created zip file, tap “Share”, and email it to me at [email protected]. Thank you!
In some cases, it can be helpful to see some more diagnostics from your device, and I may ask you to send a sysdiagnose. Sysdiagnose is a built-in iOS utility which records a variety of diagnostic information to a file that can be sent to Apple or to developers.
To provide a sysdiagnose:
* Additions marked with a “*” are paid upgrades: If it’s been more than 12 months since you purchased Loopy Pro, unlocking these will require a one-off in-app purchase, which will also unlock any new features released over the following 12 months. Upgrading will help me keep working on Loopy Pro for years to come. See loopypro.com/pricing for details.
Open the Loopy Pro roadmap below to view and vote on current roadmap items, suggest ideas and leave feedback, and subscribe to receive email notifications on when individual roadmap items are implemented.
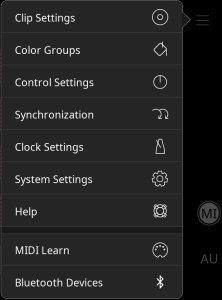 Most of Loopy Pro’s configuration is done via the settings panels available from Loopy Pro’s main menu.